

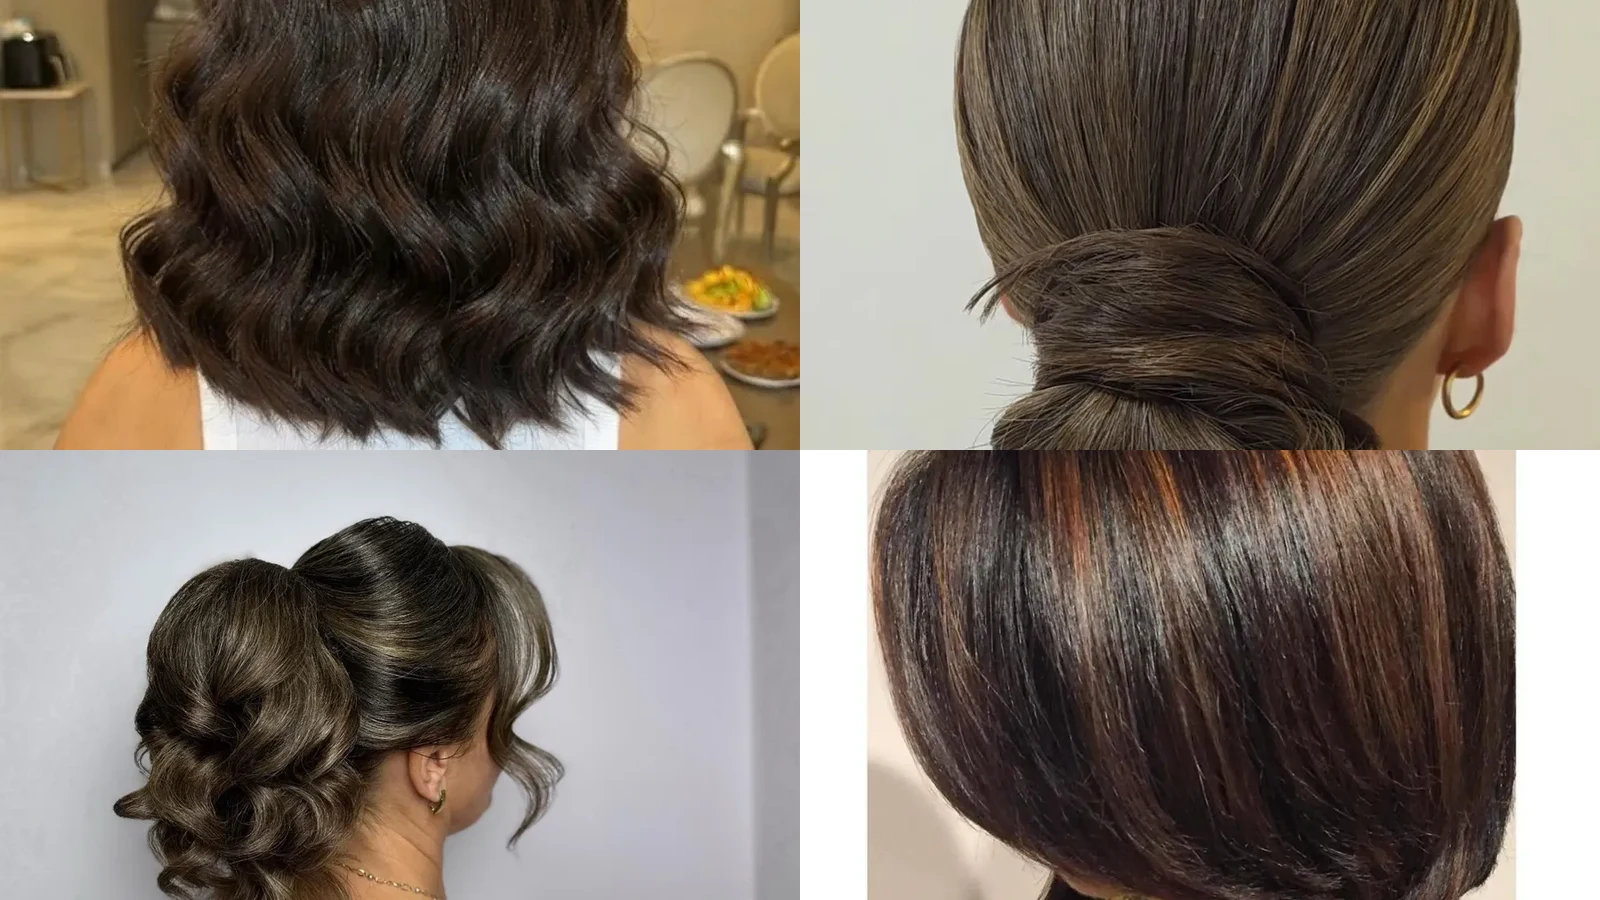
Pins, a round brush, and a small iron cover almost every look here. Some styles lean on waves, from deep S shapes to loose side sweeps. Others tuck hair into low buns, wrapped in a twist, a roll, or a fold. Bobs bring flicked, tucked, or blunt edges, while ringlets, two-strand twists, and a scrunchie pair add texture and shape. Each pick suits easy hairstyles for medium hair Thanksgiving plans, with steps short enough for a busy kitchen morning. Colors run from black and copper to blonde, with brown highlights and dark roots in the mix. Shoulder-length hair usually holds each shape well, so even a quick morning can end with a polished result.
1. Layered Fringe Waves
Soft shine sits across the crown, while light brown highlights thread through darker lengths. Loose waves reach the shoulders, and fringe pieces sweep to one side before blending into the front layers. Layers at the back run fuller than those in front. Small tips flick outward at the ends. Seen from the side, the cut has a rounded outline with shorter layers on top.
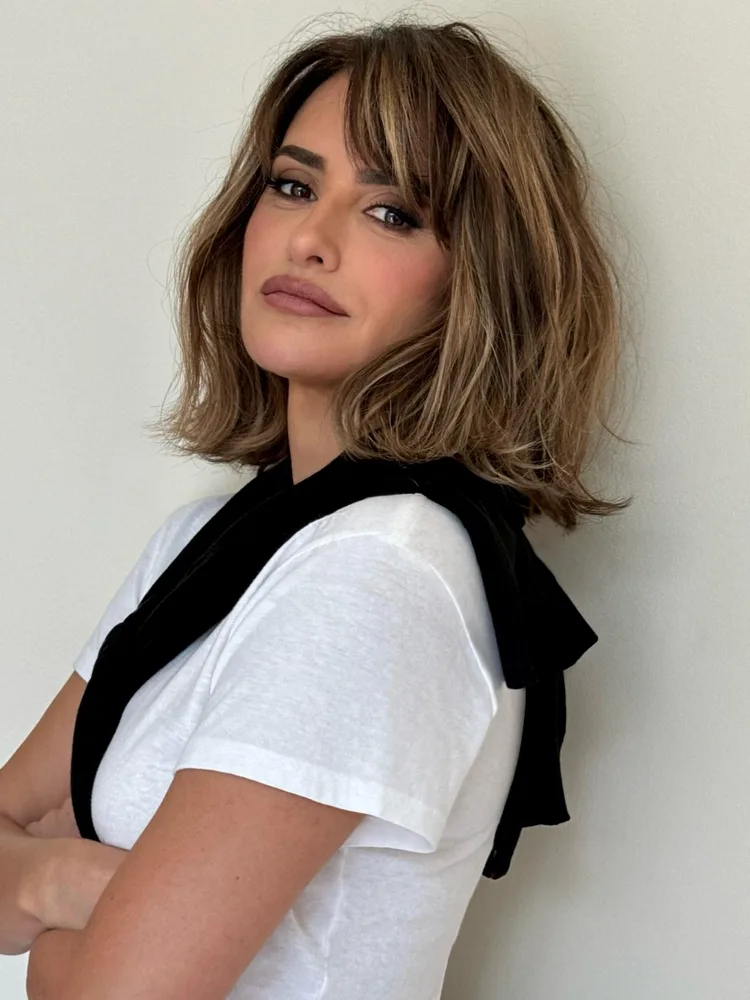
Waving the fringe along with everything else is a common slip, because heat can flatten its side sweep. Set that piece aside. Apply heat protectant. Then wave the lower layers with a medium iron, and brush once to loosen the shape. Use texture spray on the middle lengths alone, and leave the crown nearly untouched. Spritz the ends lightly so the layers hold.
2. Folded Low Bun
Dense, even strands make up the bun, with highlights showing through the top. Hair pulls back from the crown into a wide, flat fold at the nape. One thin strand slips loose at the left edge of the fold. Along the bottom, the edge curves under neatly. Seen from behind, the bun rests low and spreads wide, with no tail trailing under it.
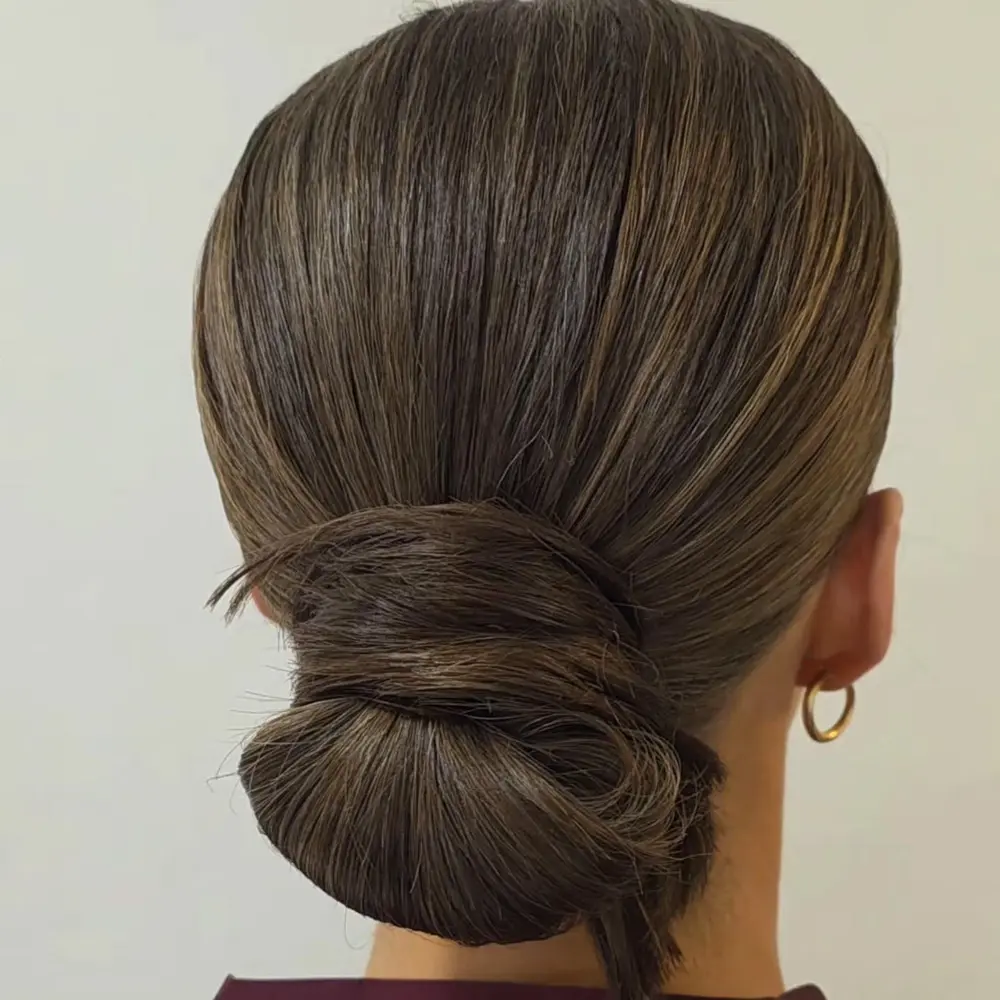
Pulling the fold tight is the usual error, because it squashes the full, wide shape. Keep the loop relaxed. Bring dry hair low and brush the crown smooth with soft bristles. Lift the tail upward, tuck the ends beneath, and secure each end of the fold with a pin. Push two more pins through the middle. Finish with a light mist on the crown and a quick mirror check.
3. Half-Up Top Knot
Loose and textured, the knot sits high at the upper back. Smooth dark strands cover the crown, with shorter pieces slipping out near the front. Below the knot, hair falls straight to the shoulders and waves gently near the ends. Viewed from the side, the knot rides above a curtain of free hair. Only the top section is gathered, so the rest stays loose.

Skipping a re-pin after hugs lets the knot sag, because knots on top slip before anything else. Use ear height as the dividing line between upper and lower hair. Wind the upper part once, coil it into a small knot, and cross two pins underneath. Lay flyaways flat with a sprayed brush instead of fingers. Then tease out one thin piece at each side.
4. Glossy Back Waves
Glossy shine runs along every bend of the deep, defined S shapes. Each dark length stays even in width. Waves travel down the back to the shoulders, and the tips end in loose curls. Hair on top stays smooth and flat, which sets up the contrast below. Seen from behind, the pattern looks even left to right, with clear movement in a wide shape.
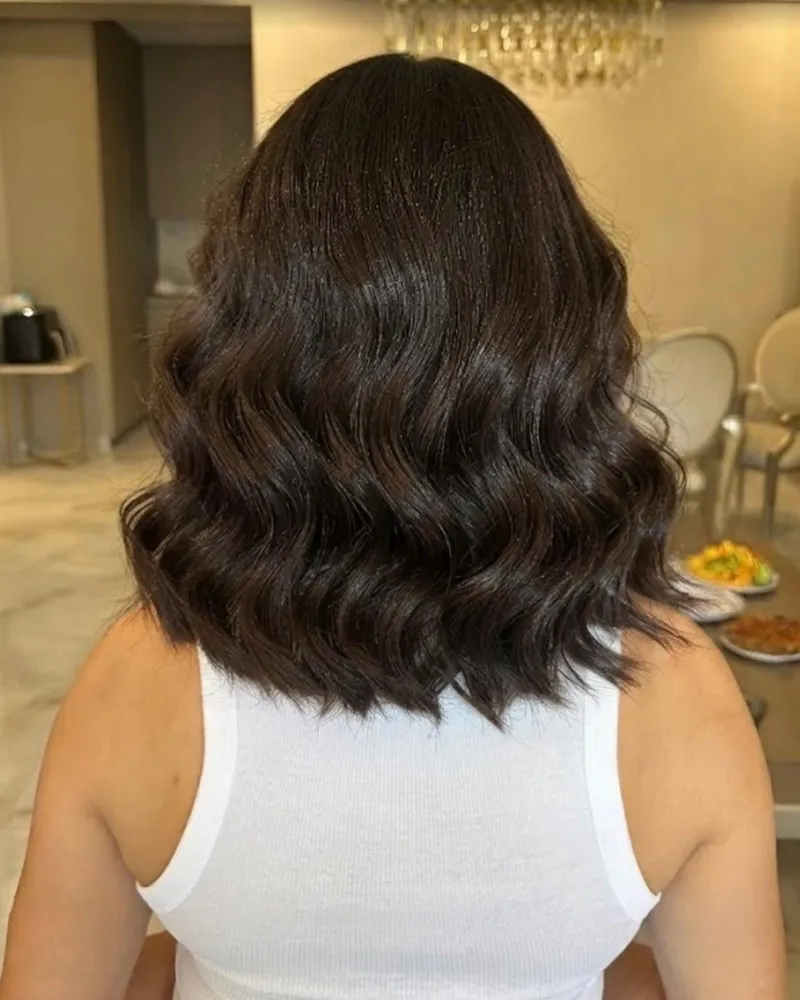
Piling product onto the crown is the usual slip, because it dulls the lift above the waves. Brush hair straight, then curl medium sections around a wide barrel, switching direction each time. Apply heat protectant before any iron touches the hair. Wait two minutes before touching any wave, since warm curls drop quickly. Run a wide-tooth comb through once. Finish with a pea-size dab of serum on the ends and a light mist on the mid-lengths.
5. Center Part Layers
Long, smooth sheets of hair carry shine along their outer lengths. Layers drop from a center part to shoulder level, where the ends meet. Front pieces bend inward near their tips. Lower layers curl under into a rounded shape beneath the straight upper hair. Top layers sit full and balanced. Facing the front, both sides mirror each other neatly.
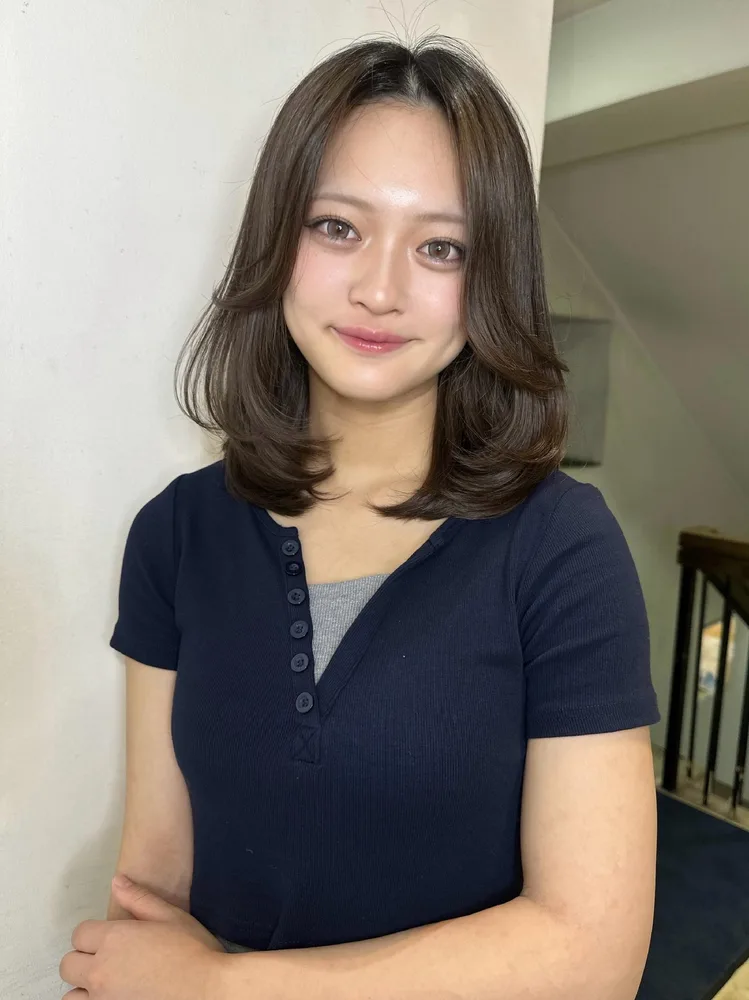
Leaving a wavy part in place makes layers look uneven, so comb it straight again once hair is dry. Work with damp hair parted down the middle. Roll a round brush beneath the front sections as the dryer passes over. Smooth the back layers next, then roll their ends under with that same brush. Hold the brush at every tip for ten seconds. Finish with one light mist.
6. Straight Shoulder Layers
Gentle shine settles on the brown lengths, which run flat from a side part to the shoulders. Long layers give the lower edge a stepped look, though the tips end cleanly. Pieces at the front hang longer than those at the back. Hair on top stays smooth. Looking straight on, the cut reads as straight, with layering close to the tips.
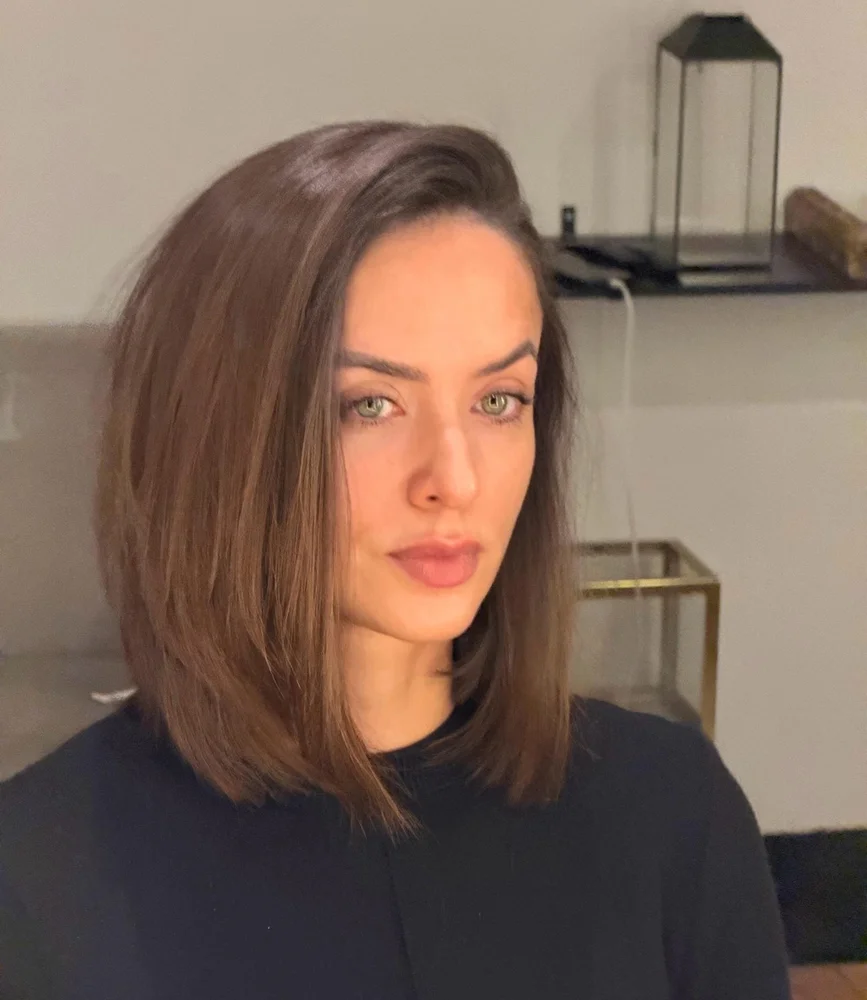
Oily marks are the usual risk when fingers smooth flyaways, so use a sprayed brush instead. Guide every section downward with a paddle brush as damp hair dries, steering away from the part. Apply heat protectant, then press thin sections of the lower layers with a flatiron. Skip the crown to keep natural lift. Smooth a bit of serum over the ends, then scan the sides in a mirror for uneven layers.
7. Black Two-Strand Twists
Slight sheen glints on black, rope-like twists that hang in many thin strands to the shoulders. Neat partings form a clear pattern across the crown. Each twist keeps its own line from the scalp to the end. At the tips, tiny tight coils form. Overall, the set looks thick and balanced. Behind the head, the twists make a dense curtain of curled tips.
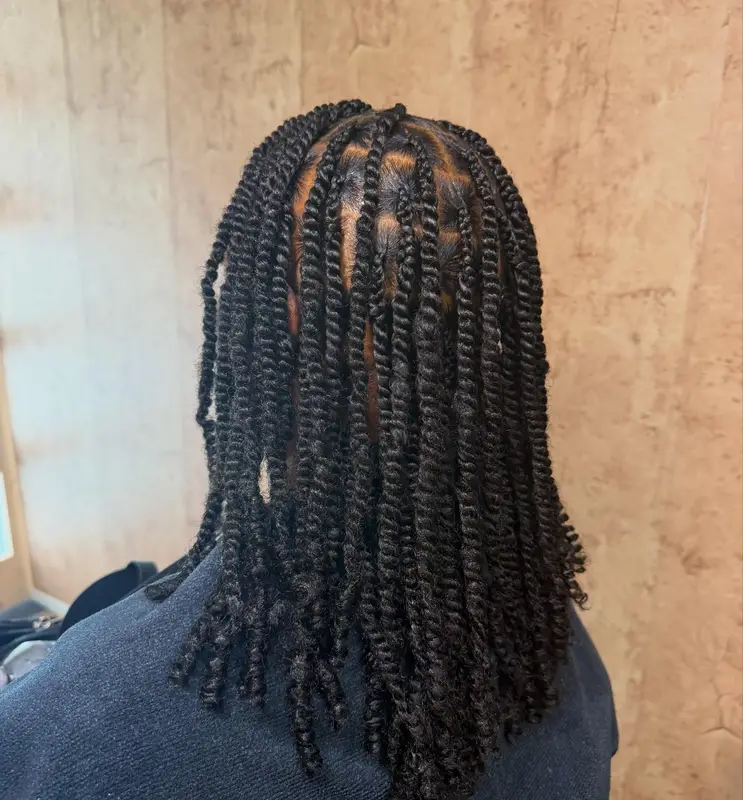
Pulling twists apart while they dry is the quickest way to lose the pattern. Split damp hair into equal sections. Work twisting cream through each section. Then wind two strands in one direction and twist down to the tip. Wrap the final inch around a finger. Leave them to air-dry, which usually takes about an hour. Satin bedding the night before helps, since cotton tends to fuzz the pattern.
8. Low Wavy Ponytail
Loose waves run through the tail, which ends in a curl at the shoulders. Hair gathers low at the back into one tail. Brown hair lies flat and smooth across the top of the crown. Behind one ear, a side piece stays tucked away, and the ponytail base sits clear at the nape. Seen from behind, movement gathers at the ends of the tail.

Forgetting a spare elastic is the classic slip, so tuck one in your bag. Gather dry hair low, brush the crown smooth, and tie it off with a sturdy band. Apply heat protectant. Then curl the tail in two parts with a medium iron, and brush it once. Hide the elastic with a thin strand wound around it, and pin the end underneath. Leave the crown unwaved, since smooth hair on top sets off the tail.
9. Mid Ponytail Twist
Smooth copper hair runs straight into the tie, while a twisted loop wraps the base. Hair gathers at mid height rather than low. Below it, the tail bends in one wide wave and ends in a loose curl. Lifted by the loop, the tail sits at mid-back. Behind the head, the twist rests just above the tie, with the tail hanging below.

Brushing the crown only after tying leaves visible bumps, so smooth it first. Tie dry hair off halfway down the back with a strong elastic. Take a small piece from the tail and twist it around the base. Anchor the loop with a pin at either edge. Apply heat protectant. Then curl the tail as one big section and brush through once to widen the bend.
10. Twisted Low Bun
Shine glides across the top of dark strands wound into a smooth coil. Hair forms a low, rounded bun at the nape, and its edge looks dense. Sides lie flat and neat against the head. Close to the ear, a fine tendril drifts loose and curls downward. Viewed from the side, the bun rests below the ear line, and the tendril hangs next to it.

Pulling the loose strand straight erases its curl, so give it a gentle bend with a small iron. Apply heat protectant before curling that strand. Divide dry hair low, cross the two halves once, and wind them into a round bun. Secure the bun with pins from four sides. Brush hairspray over the sides, keep three spare pins close, and look at the bun before photos.
11. Polished French Twist
Smooth sides lead into a vertical twist at the upper back of the head. Dark hair folds in even layers, and a rolled line runs down the center of the twist edge. Hair on top stays flat, while the bottom end slips underneath. One curled tendril falls beside the twist, which rises tall when seen from the side. Every layer lines up neatly along the roll.
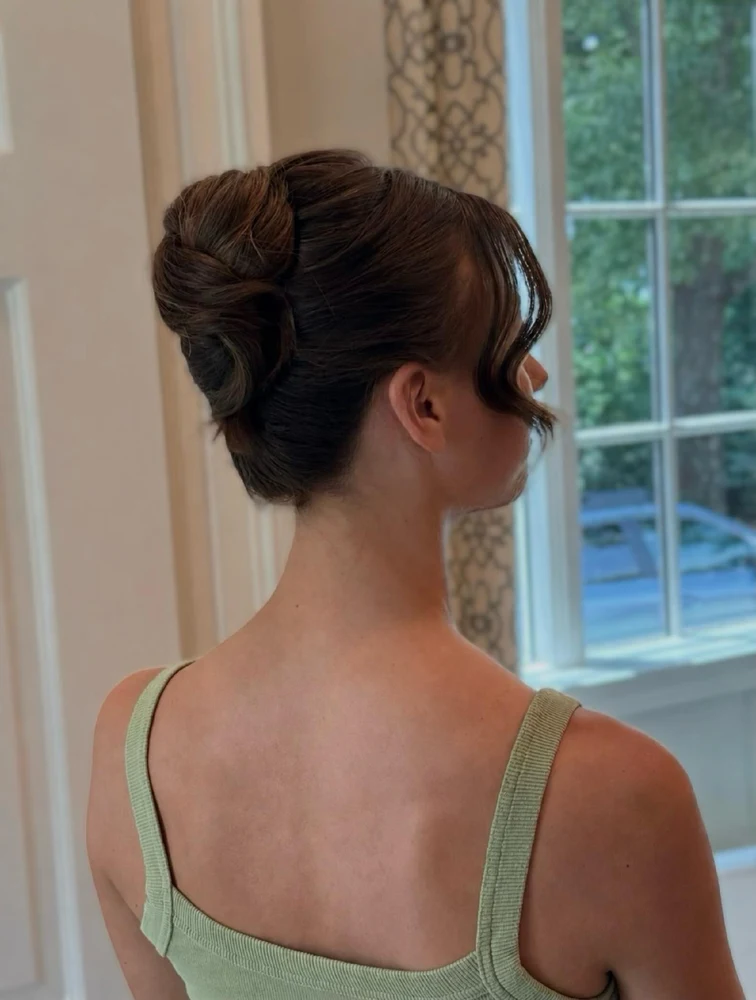
Pins set on the outer surface tend to slip mid-meal, so slide them inside the roll instead. Bring dry hair to one side and hold it at the back. Roll it up on itself into a tall column. Run four long pins down the roll, and hide the ends within it. Apply heat protectant, then twirl a front strand around a small iron. Brush the sides smooth and mist lightly. Check the pins again after an hour.
12. Double Braid Headband
Thick, even braids sit in two rows across the top of the head, set close together. Straight blonde hair falls below them to the shoulders, parted in the center with smooth sides. Braid ends tuck behind the ears, and the rows form a clear band over the crown. Together, they work like a headband sitting above the straight, loose hair below.
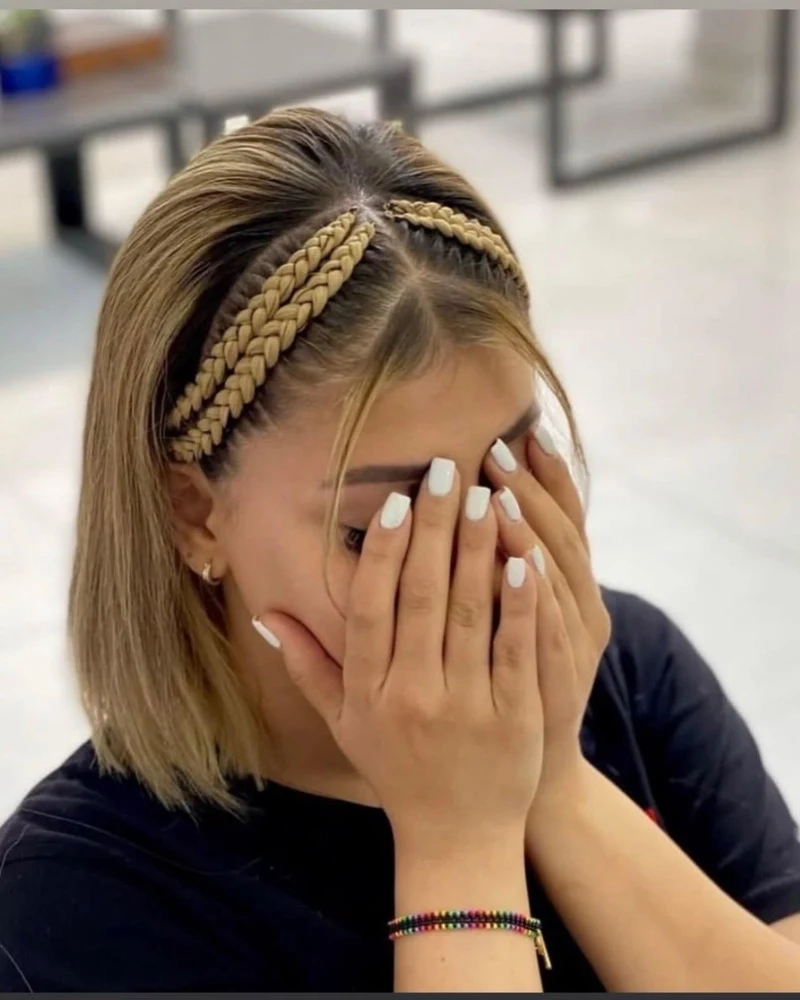
Gel on the loose lengths makes them stiff, so confine a light gel to the braids. Weave two small three-strand braids on both sides of the parting, keeping the pull steady. Lay them over the crown and fasten each tail on the far side, behind the ear. Look over the tails later in the day, because one loose end breaks the shape.
13. Tucked Under Bob
Shine skims the outer strands of dark hair that falls straight from a side part. Lengths here are even, and the bottom line bends inward in a single tidy curve. Hair on top lies flat against the head. At shoulder level, hair curls beneath into a soft, round bob. Seen sideways, the tips fold inward near the jaw, finishing the rounded shape.

Rushing to the next section lets the tuck spring back, so let each one cool first. Flatten dry hair using a flatiron after heat protectant. Roll each thin section under with the iron, then hold it at the tips for five seconds. Brush the ends under once. Smooth a bit of serum along the lower edge. Skip spray at the crown, and re-curl any side that flips out.
14. Flicked Out Bob
Gentle shine lies over the dark, smooth top of this bob. Ends flick outward at the sides, angled clear of the neck. Hair parts to one side, which leaves one side longer. Along the bottom, the edge looks light. Both sides repeat the same turn at the tips. Facing forward, the tips swing outward around jaw height, with lengths reaching the shoulders.
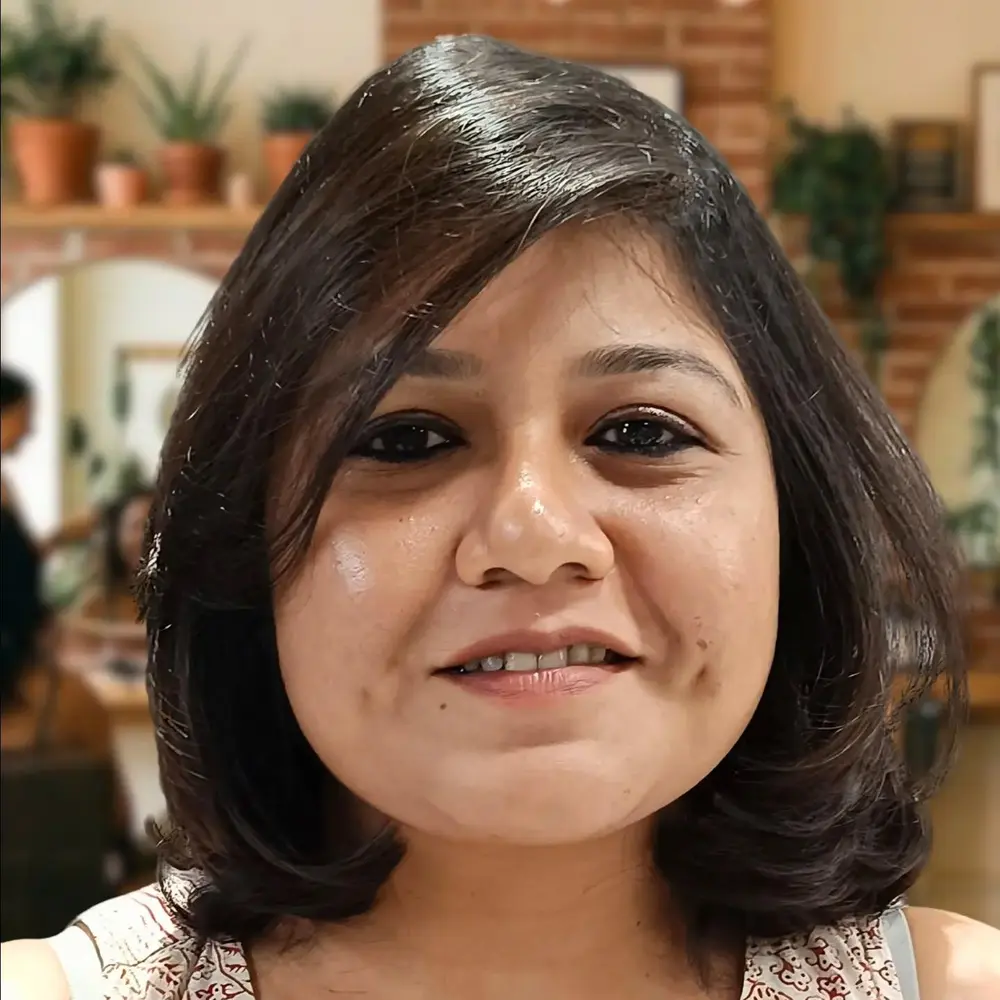
Heavy spray on the tips weighs them down and flattens the outward turn, so keep any mist light. Dry the crown straight first, because waves there hide the flick. Work through each side in two sections, pointing the round brush outward at the ends. Finish by flicking the tips with a small iron after applying heat protectant. Smooth hair on top keeps the focus on the ends.
15. Scrunchie Double Buns
Large fabric scrunchies gather around the base of each round bun. Blonde hair pulls up and out into two buns perched high, one at each side. Loose strands escape near the crown. Both buns look equally round. Down the middle, a center part splits the hair into equal halves. Seen head-on, the buns rest above the ears, and the scrunchies become the main detail.
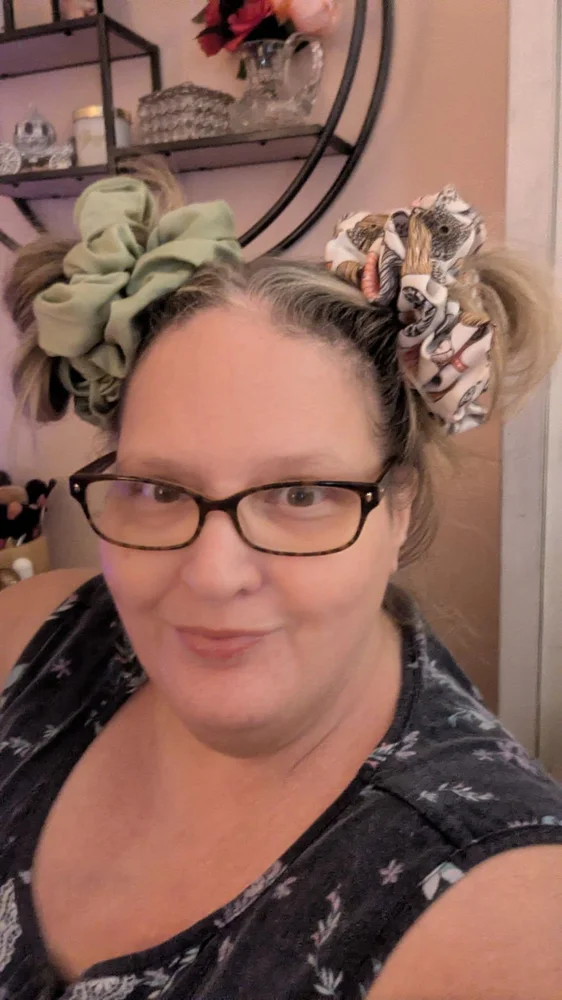
Relying on a scrunchie alone lets it slide on sleek hair, so snap a strong elastic under each. Part dry hair straight down and draw each half into a high ponytail. Coil each tail into a small bun. Slip a big scrunchie over each base, pin each bun from underneath, and tease out a few strands. Compare the pair in a mirror, since a mismatch shows up first when viewed head-on.
16. Blonde Blunt Bob
Light reflects along the flat strands, which stay smooth on top beside a side part. Dark roots fade into light blonde ends. Hair falls straight to the shoulders in one blunt shape. Lengths in the middle look even, and the bottom edge runs straight across the shoulder line. Straight-on, the bob looks even from side to side, with a clean bottom line.
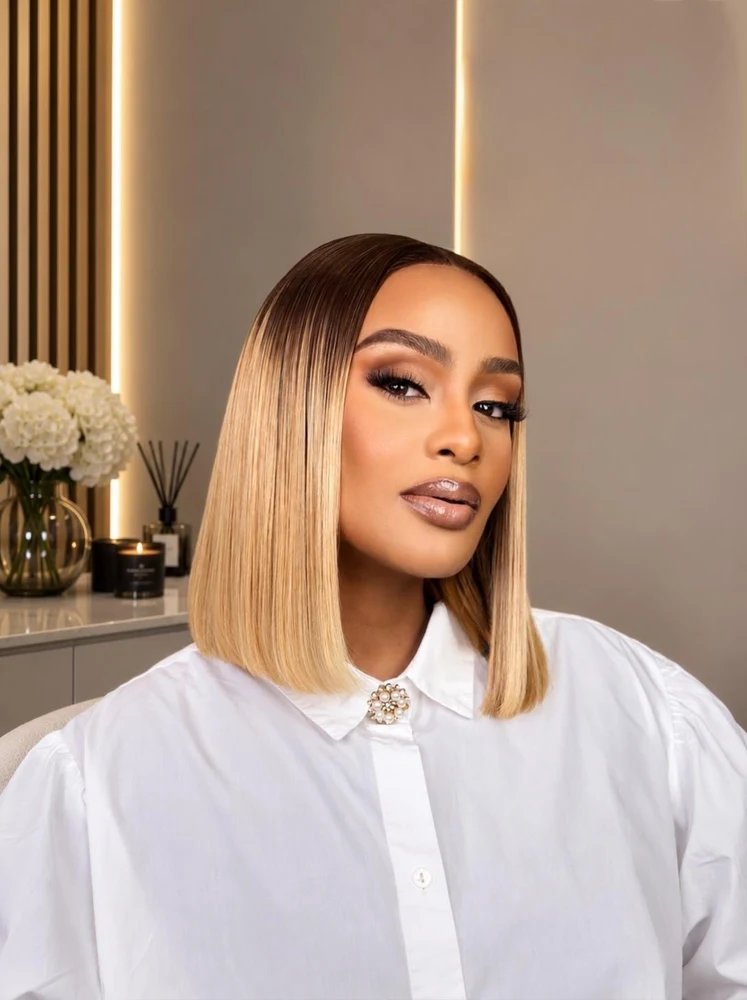
Letting hair dry naturally often kinks the ends and softens the straight line. Work a paddle brush through dried hair and set the part. Press thin sections with a flatiron after heat protectant. Even out the bottom edge with a trim ahead of time. Use a bit of serum on the ends, and keep oils away from the roots. Carry a small comb for touch-ups.
17. Feathered Blonde Layers
Thin, wispy tips give the blonde bob its feathered finish. Strands split into fine wisps near the tips, while lower layers show air and movement. Side pieces hang longer than the back layers. Overall, the shape curves in a round line to the shoulders. Upper layers stay smooth across the top. Seen from the side, the cut looks light and layered, with feathered tips.
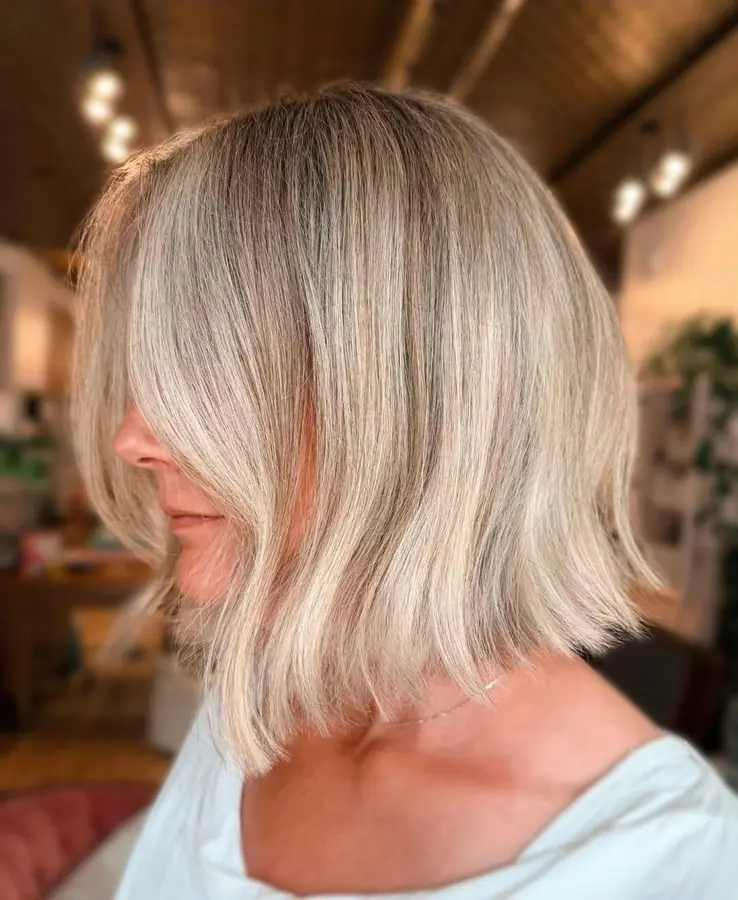
Rich creams glue wisps into clumps, so skip them on these ends. Use heat protectant first. Lightly mist the hair, then dry small sections over a round brush, angling it out at each tip. Raise the roots as you go for body. End with a light spritz at the tips alone. Run a brush through the tips one time before photos so the layers stay apart.
18. Ringlet Medium Curls
Shine rides on the outer curls of tight, defined ringlets that fall in a rounded shape. Each dark curl is similar in size, and the tips twist into tiny spirals. Hair sits full across the top, with no parting line. Down the back, the outline stays full from crown to shoulders. Seen from behind, the dark curls pile into a thick, even mass that moves at every layer.
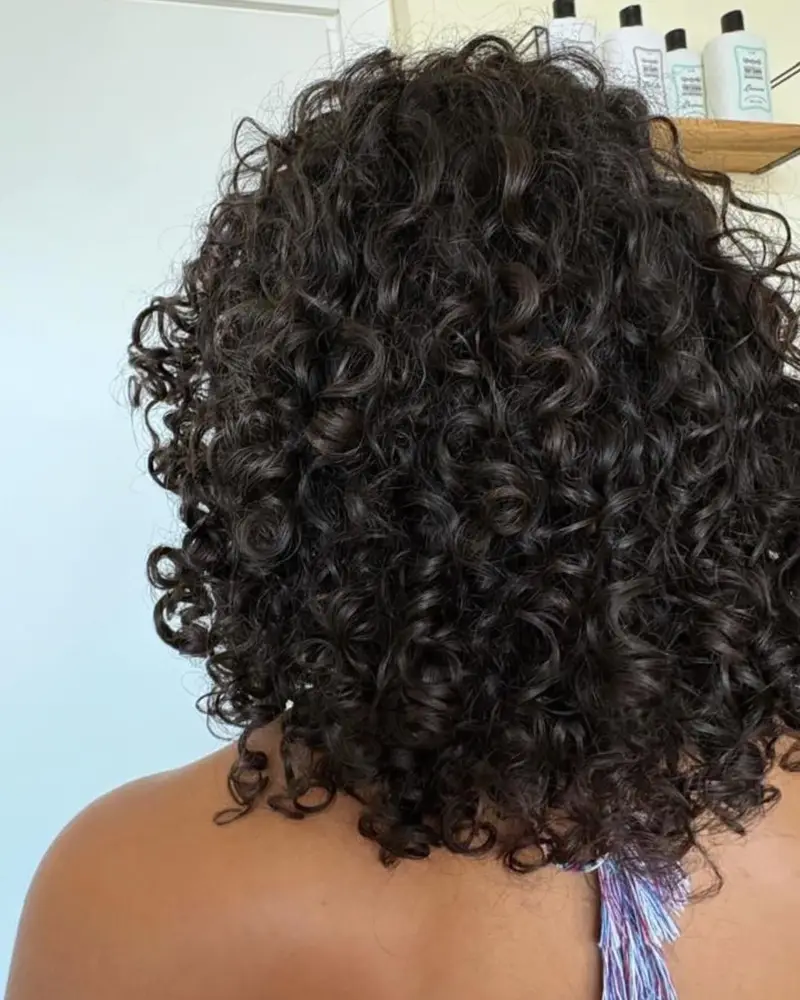
Running a brush through dry curls puffs the ringlets out, so keep it in the drawer. Work a quarter-size scoop of curl cream through damp hair by scrunching. Go section by section so every curl gets product. Use a diffuser set to low heat, raising sections at the roots. Revive the curls later with a water spritz, then scrunch the tips upward again.
19. Rounded Layered Bob
Warm highlights glow through brown lengths that curve around the head. Layers step down in rounded tiers from the crown. Smooth curves finish each end as it turns under, and the lower edge looks rounded. Top layers sit full and balanced. Sides hang longer than the back. Viewed from behind, stacked layers build a full, curved shape that reaches the shoulders.
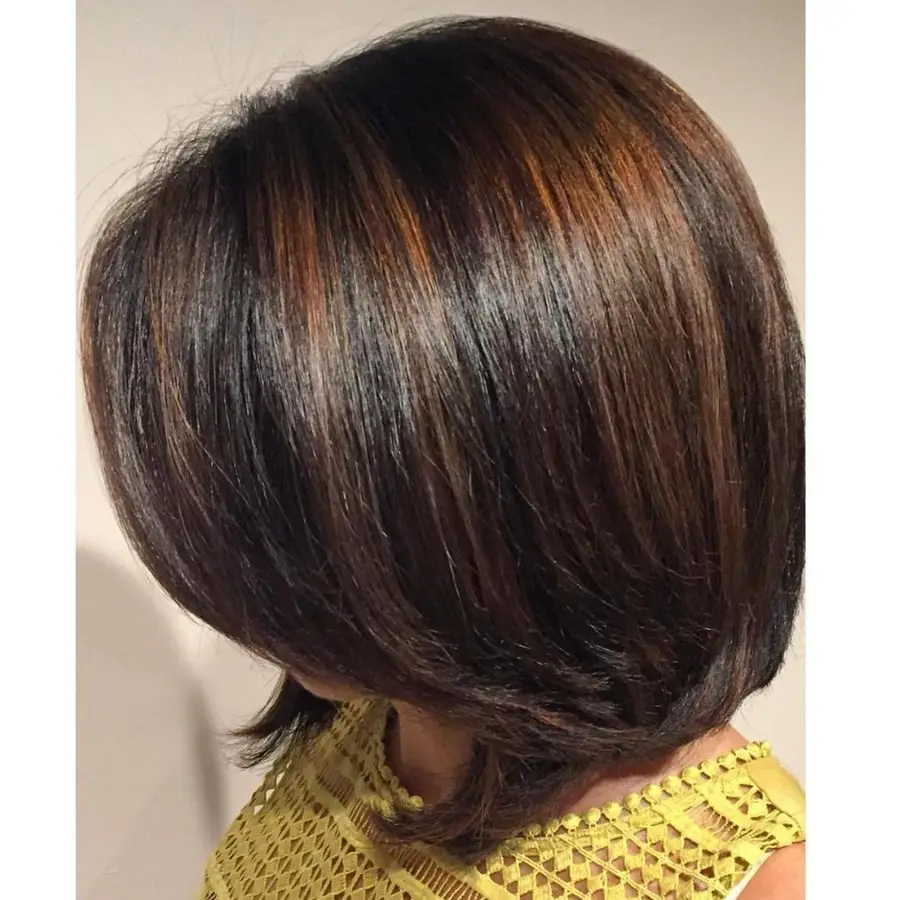
Blasting all the layers at once squashes the curve, so dry them one at a time. Use heat protectant first. Start at the back with a round brush on damp hair, finishing at the sides. Roll the brush beneath each end, and raise the roots for body. Mist lightly to set it. Use a hand mirror to check the back for flat spots.
20. Back Flicked Ends
Airy, separate ends bend away from the neck in a light wave. Brown hair falls straight to the shoulders from a center part, with smooth top layers above. Shape stays wide at the bottom, where the tips flick outward. Seen from behind, the hair reads as one straight sheet, tips flipped outward. Hair lies straight and even down the back between the part and the tips.

Thick serum on the tips weighs the bend out, so leave it off. Aim a round brush outward at the ends of dry hair. Dry the back in three parts, starting at the middle and moving to the edges. Bend the tips with a small iron after heat protectant, then spray lightly. Keep the crown smooth. Redo the flick on whichever side you slept on, since it relaxes first.
21. Side Swept Waves
Loose, natural waves relax further toward the ends, where lighter tips show on the lower lengths. Brown hair falls to the shoulders from a side part, with a smooth top. Hair near the front sweeps over the crown. Pattern looks uneven in a natural way. Seen from the side, the waves fall in one sweep. Longest pieces sit at the front.
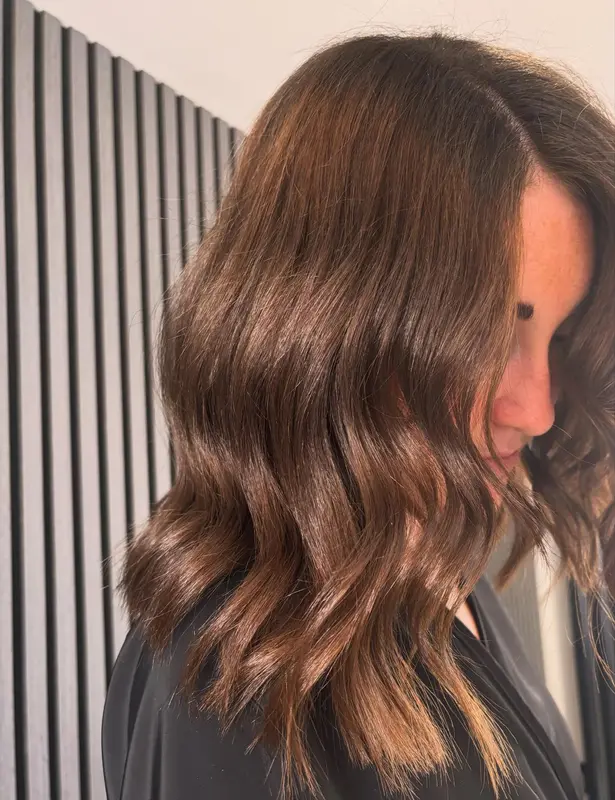
Skipping a post-wave comb lets the part drift toward the middle. Curl wide sections of dry hair over a large iron after heat protectant, guiding the front pieces sideways. Brush through once. Rub a pea-size bit of wave cream into the ends, and give it ten minutes to set. Clip the short side back at the ear during the first hour to hold the sweep.
22. Rolled Low Bun
Glossy shine marks the dense edge of a smooth, round bun that sits at the nape. Dark lengths roll under in one even coil, and no loose tail hangs below. Its surface looks even across the whole coil. Strands on top lie flat as they sweep straight back from the crown. Viewed from the side, the bun makes a tidy ring low on the back.
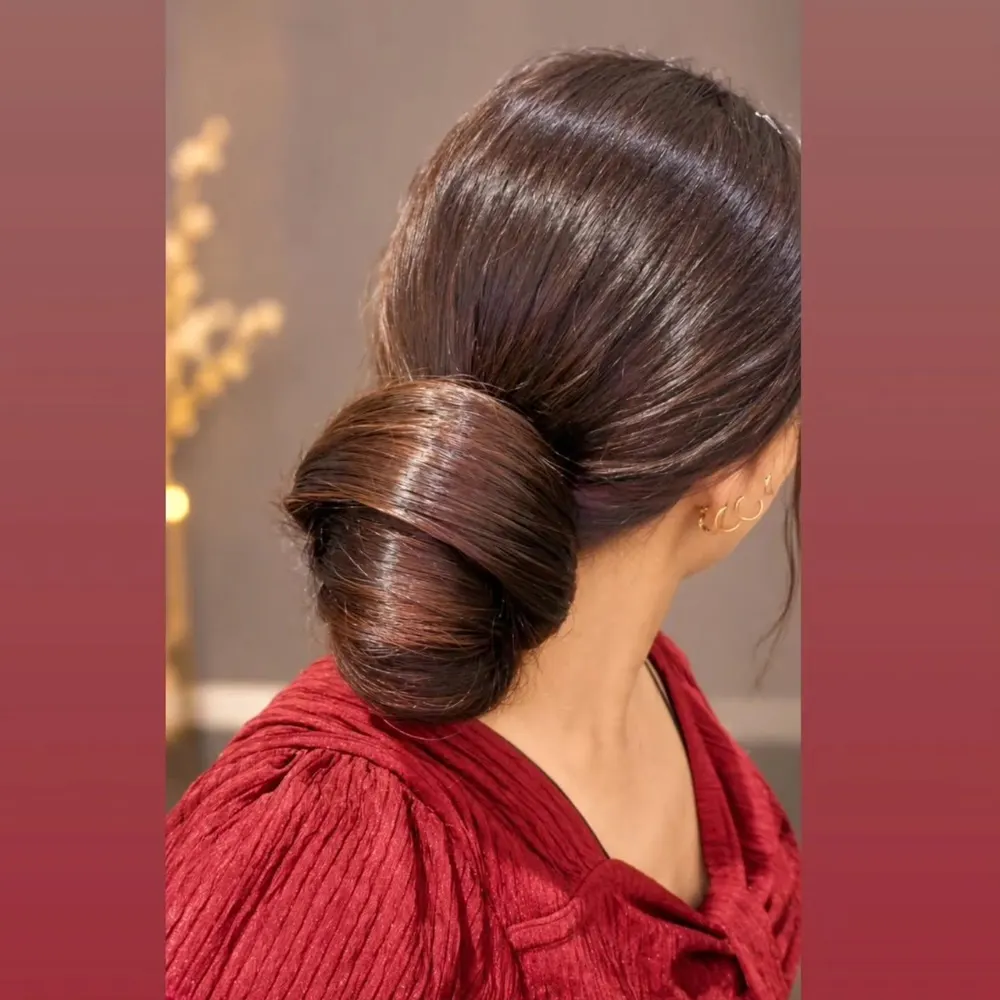
Winding with too much tension shrinks the coil, so ease off as you roll. Gather dry hair into a low ponytail. Roll the tail up on itself and anchor it with one pin. Hide the tips inside the roll, set three pins around the edge, and brush the crown flat. Spritz lightly, then glance at the roll in a mirror. Keep two spare pins nearby.
23. Curled Low Ponytail
Tight curls bounce at the ends of the tail, spinning in every direction. Brown hair carries lighter highlights, and the top stays smooth. Curls reach the shoulders from a low ponytail base. At the nape, the base sits clear of the curls. Near the side, one curled tendril slips free. Viewed from the side, the tail stays short and full of movement.
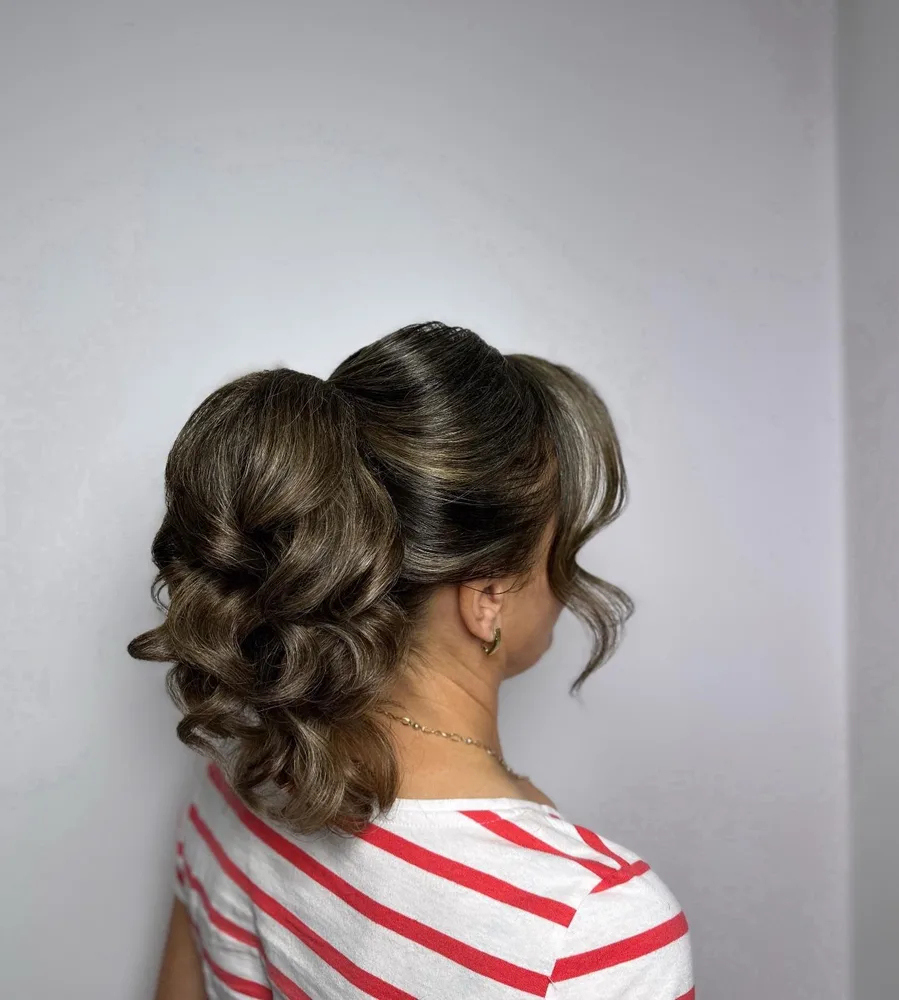
Curling the top hair buries the low base, so brush the crown smooth before tying. Work through small sections of dry hair with a small iron, after heat protectant. Tie the hair low with a sturdy band. Cover the band with a thin strand and pin it from below. Loosen the curls with a gentle shake. Mist the tail only, leaving the crown untouched.
24. Voluminous Front Waves
Glossy shine runs through dark waves that bend in wide, uneven curves. Hair lifts at the crown, then falls to the shoulders from a side part. Pieces in front hang longer over the shoulders, and the tips relax into one easy wave. Overall volume comes from the crown, where the lift begins. Facing forward, the hair appears full as waves drift outward.
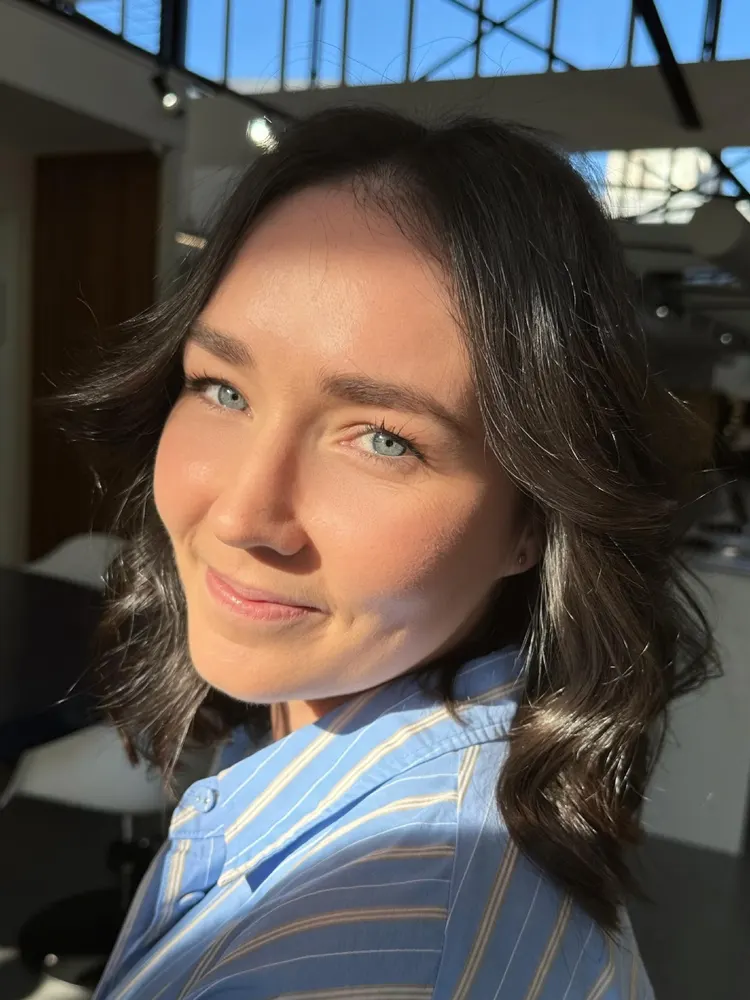
Roots coated in product lose their lift quickly, so keep styling cream near the ends. Wave medium sections of dry hair after heat protectant, then shake them out. Brush through once to soften the pattern. Raise the roots with a wide-tooth comb. Then work wave cream into the ends and give it ten minutes. Shake the hair out again before photos, because waves relax once you have been seated a while.
25. Braided Low Bun
Black twists and braids weave together over the bun, clearly visible from the side. Neat parting lines map out a tidy design across the head. Twists and braids add texture throughout. Everything gathers into a small bun at the nape, held by a fabric tie. Bun size stays small, and its position stays low. Loose at the side, two thin twists hang free.

Pins set on the surface show against braids, so slide them in from below instead. Section damp hair evenly, then make small twists and braids from the top of the head downward. Work braid cream into each section first. Keep the pull gentle, since tight braids can strain the scalp. Gather everything up and tie it off with fabric, leaving two twists out.
Closing
Hair that behaves on a busy day usually comes from practice, not extra products. Pick one shape, run through it on a quiet evening, and note which pins and tools you used. Choosing among easy hairstyles for medium hair Thanksgiving day keeps the morning calm, since each step feels familiar. Small fixes made early beat a big restyle made in a rush. Pack spare pins and a small travel mist in your bag. Then check the mirror by the door and reseat any loose pin.
