

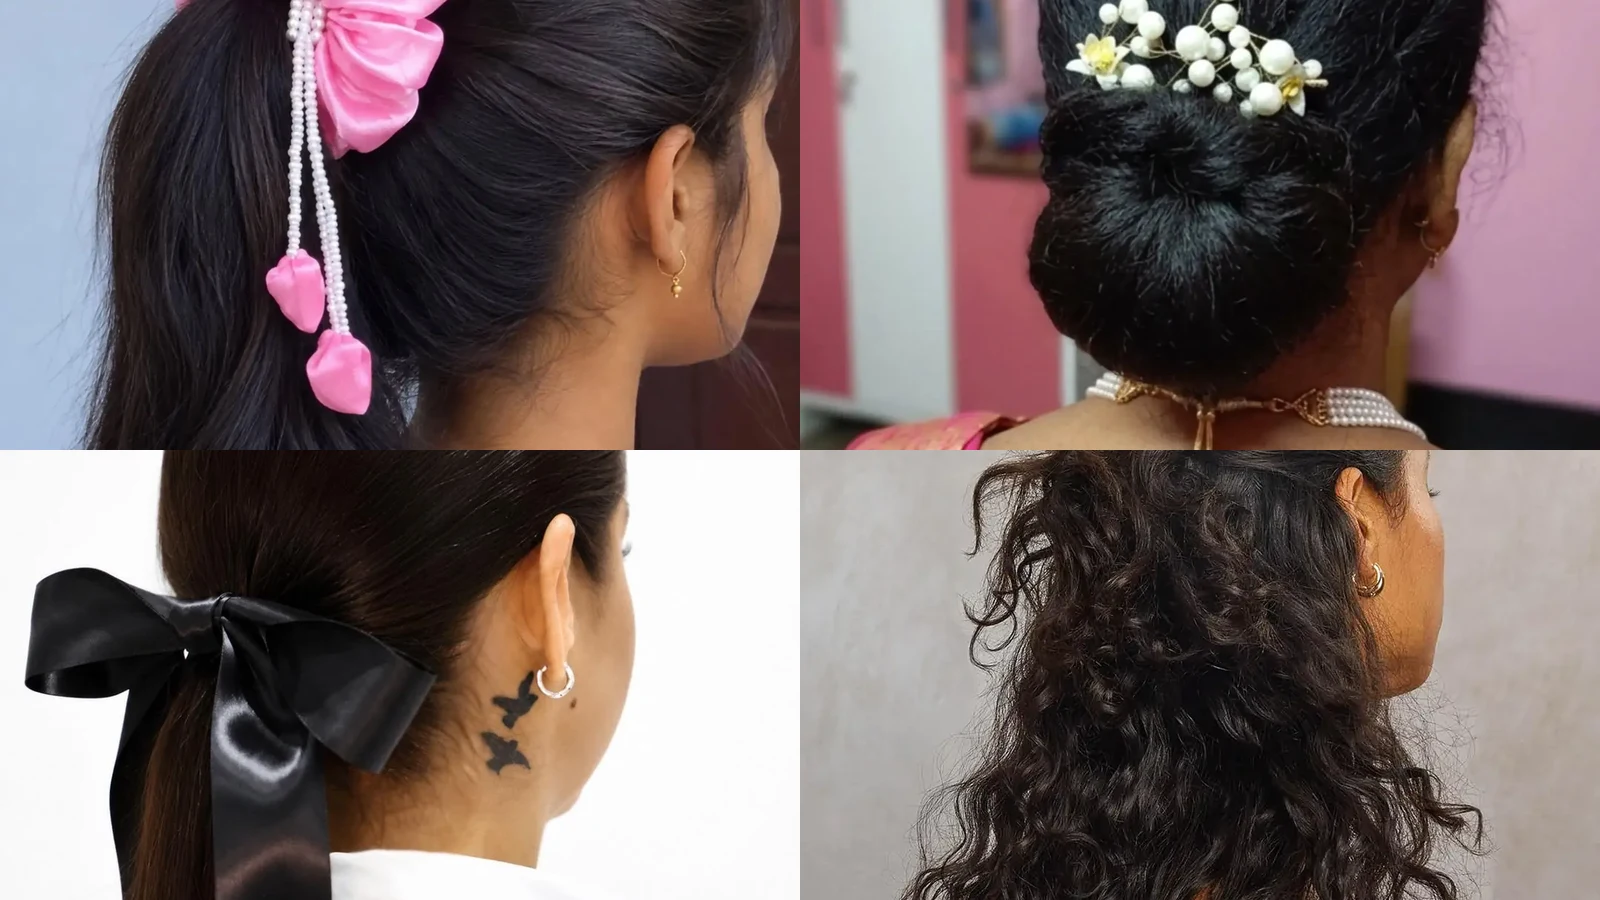
Thanksgiving mornings fill up quickly with cooking, travel, and outfit changes. Hair often gets whatever time is left, which may be only five minutes. Short routines work best when every step is clear and the tool list stays small. Picking from easy cute Thanksgiving hairstyles keeps the routine light, since each look needs just one scrunchie, ribbon, scarf, or clip and one or two pins. Every style is built to hold through a long dinner without a salon visit. Ponytails, half-up styles, buns, and scarf ties are all included, so you can match one to your hair length. Short, clear steps sit under each photo.
1. Pink Pearl Scrunchie Ponytail
Two pearl strands hang beside a long ponytail of dark hair at the upper back, each ending in a pink satin heart. Pink satin forms a wide band at the base, and gentle waves sit near the ends. Crown stays smooth at the top. From behind, the pink band stands out against the dark tail, so the color reads at a glance.
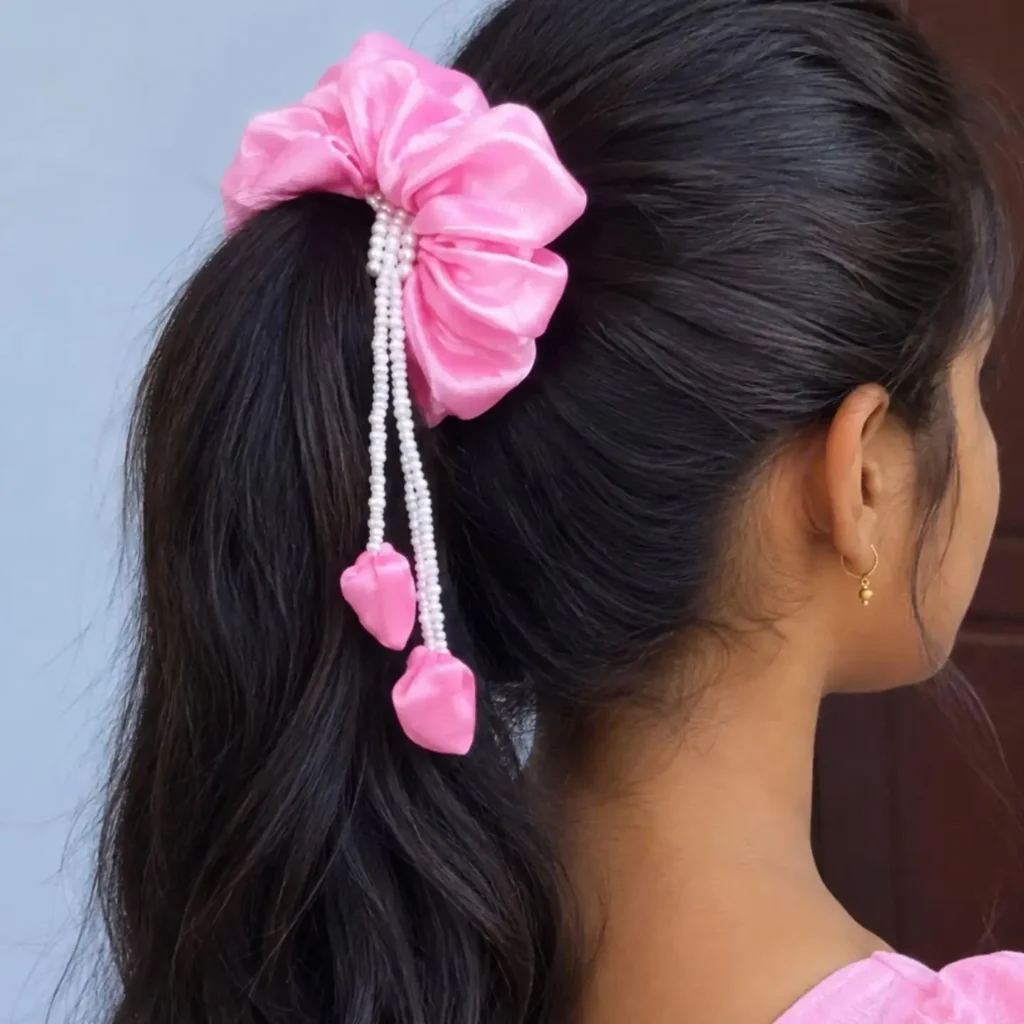
Brush dry hair back and tie it with a plain elastic before adding the scrunchie. Slide the scrunchie over that elastic, so the band hides the base and has something to grip. Smooth the crown with your hands, then curl only the last few inches if the ends look flat. Use heat protectant before any curling iron, and mist lightly with hold spray afterward. Heavy scrunchies can slide during a long dinner, so keep one spare elastic nearby. Check the pearls once before photos.
2. Beaded Side Strand Ponytail
One thin strand runs beside the ear with beads in yellow, red, and blue. Dark hair pulls back smoothly from the crown into a low ponytail at the nape. Held there by a bright red scrunchie, the tail falls straight and ends in a softly rounded line. From behind, the beads form a small line of color against the dark hair.
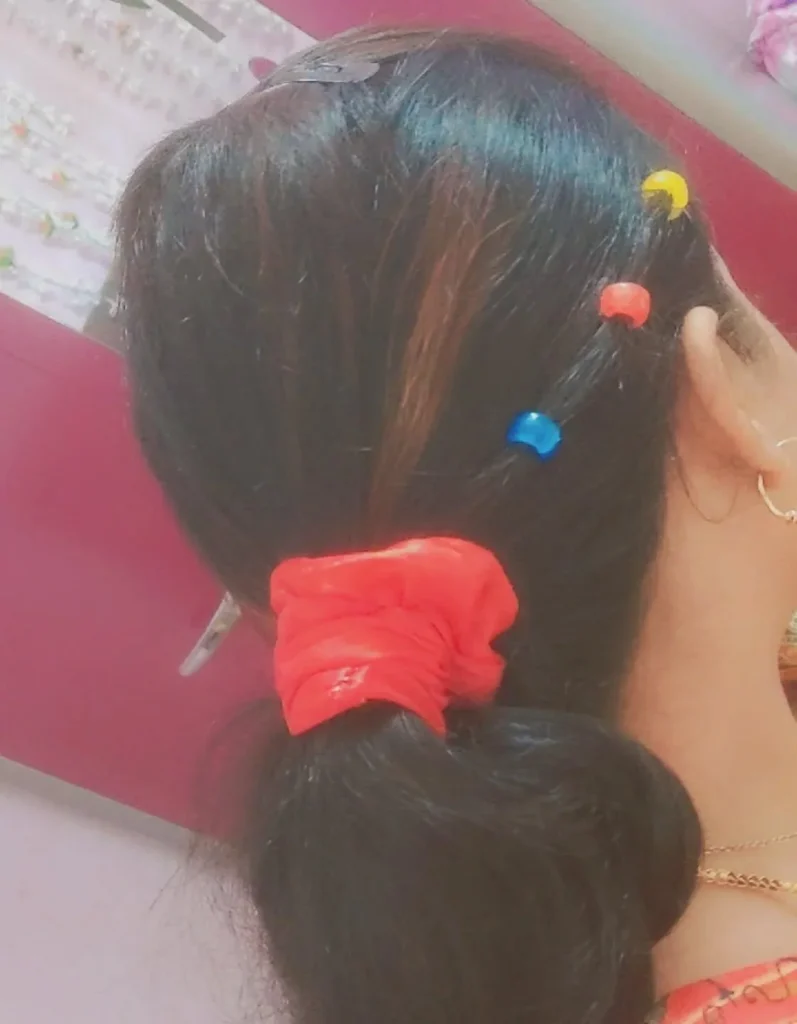
Thread three beads onto a thin side strand before you gather anything else, because the strand is easier to handle while loose. Smooth dry hair into a low ponytail and secure it with the scrunchie. Snug beads stay put, while loose ones slide down during dinner. Keep two spare beads in a small pouch and re-thread one if it drops. Brushing the beaded strand can pull beads off, so mist the crown lightly and leave that strand alone.
3. Brown Scrunchie Blonde Ponytail
Waves grow wider toward the ends of blonde hair that carries highlights. Pulled into a low ponytail at the nape, the hair is held by a small brown textured scrunchie at the base. Thin strands escape near the sides, while the crown stays smooth with a little lift at the top. From the side, the tail curves gently away from the shoulders.
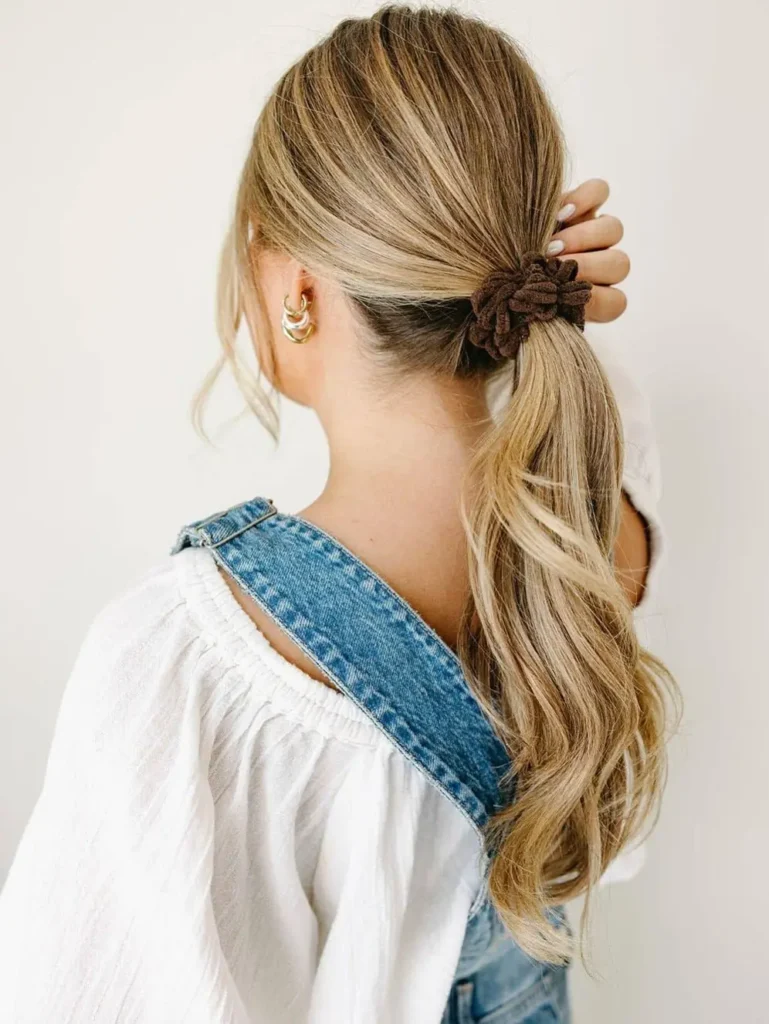
Gather smooth hair low and secure it with a plain elastic, then slide the scrunchie over the base. Wave the tail in two sections with a curling iron, using heat protectant first, and brush the waves once to blend them. Backcomb one small crown section before gathering, which gives the top lift that a smooth pull-back lacks. Low ties loosen with movement, so check the scrunchie after an hour. Pull out two thin side strands last, so brushing does not smooth them back in.
4. Looped Section Black Ponytail
Rounded loop beside the tail breaks up the straight silhouette of a low ponytail. One section curls back into a wide black satin band at the nape. Reddish-brown strands fall straight from the crown, and the tail ends in a blunt, even line. From behind, the loop adds a rounded shape next to the straight length, so the back view has more interest.
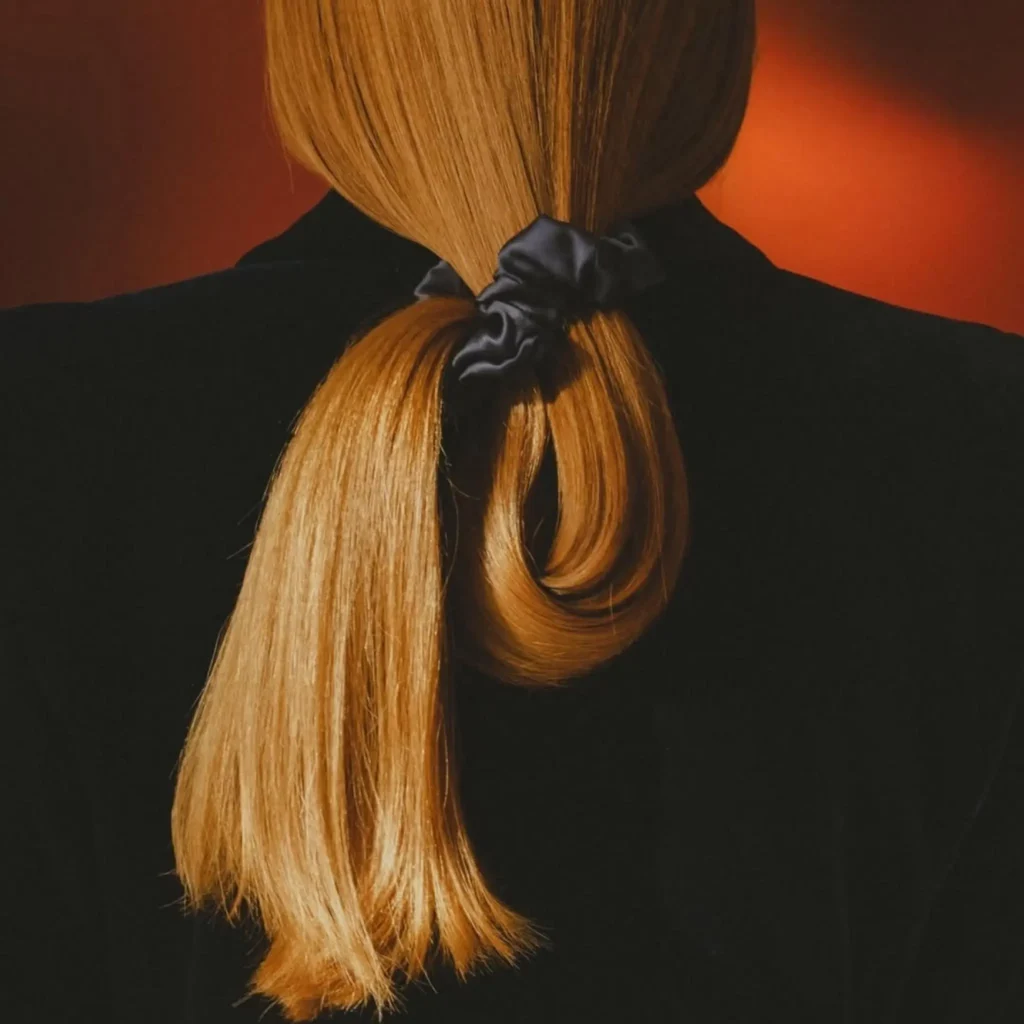
Make the loop by pulling one section halfway through a second elastic after the ponytail is tied. Slide the satin scrunchie over the base to hide both elastics. Straight hair usually holds a loop less firmly than wavy hair, so reshape it if it flattens, and wrap one thin strand around the loop’s base for support. Skip heavy cream at the crown, because it weighs straight hair down and makes it look limp. Smooth flyaways with spray applied to a brush.
5. Star Scrunchie Wavy Ponytail
Tiny stars cover a tan scrunchie edged with purple piping, which sits at the base of a low ponytail. Brown hair pulls back smoothly, and the tail falls in wide waves with curled ends. Below the tie, waves start wide and loosen toward the tips, while strands escape near the sides. From behind, the patterned band sits clearly above the wavy tail.
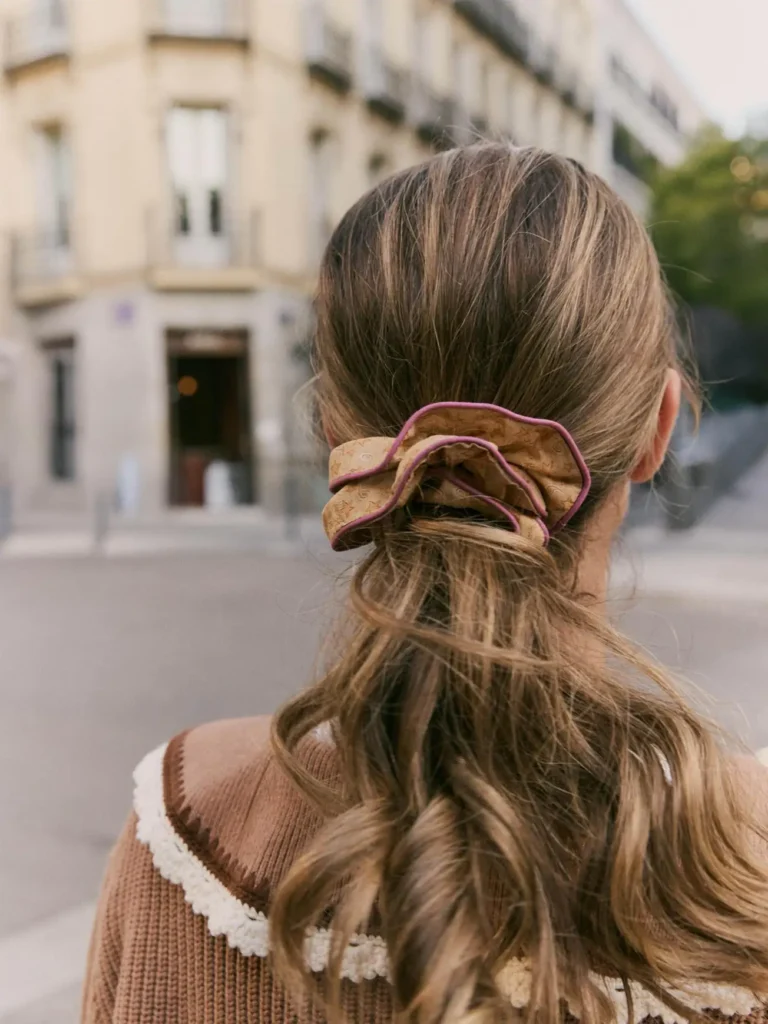
Drape dry hair back and tie it low with a plain elastic before sliding the scrunchie on. Curl the tail in three large sections using heat protectant first. Brush the waves once for a loose finish. Tight curls compete with the scrunchie’s print, so keep the waves wide. Refresh them later by scrunching with damp hands instead of re-curling every piece. Keep a small comb in your bag and reshape one wave after greeting guests.
6. Velvet Ribbon Wavy Ponytail
Natural, uneven waves fall long from a low ponytail in light brown hair, while the crown stays smooth and flat. Black velvet ribbon, narrow in width, wraps the base and ends in a small bow at the nape. Short bow loops sit at the base, and two thin ribbon ends trail beside the tail. From behind, the dark bow stands out against the lighter hair.
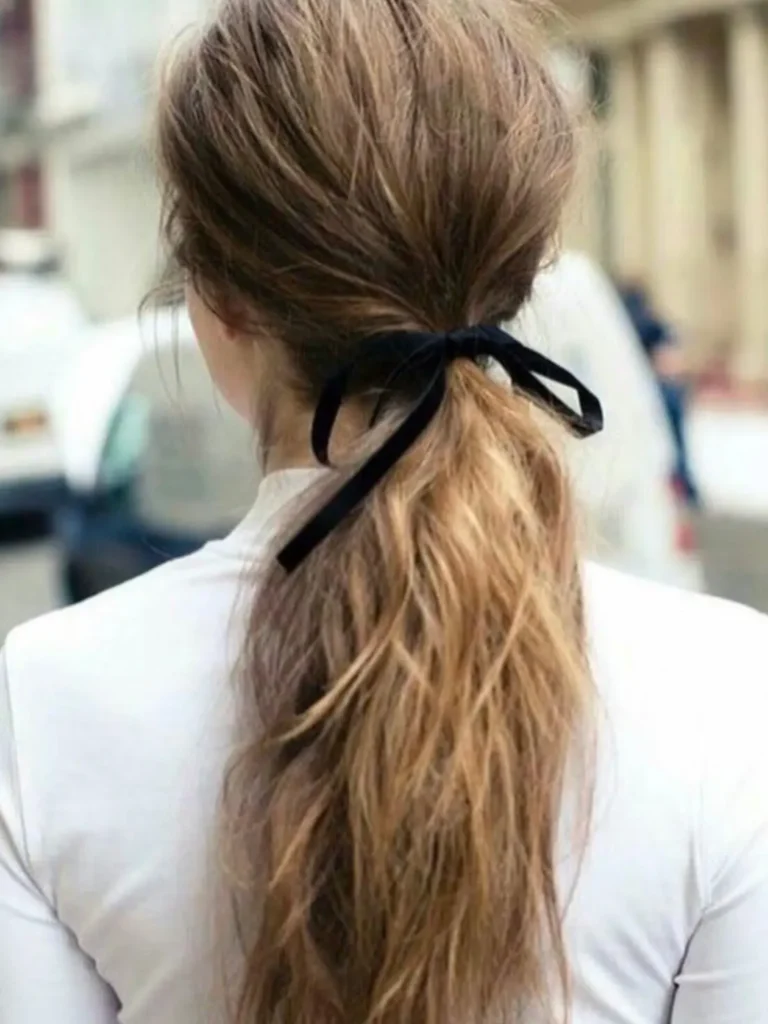
Tie dry hair low with a thin elastic, then wrap a narrow ribbon around it and form the bow. Trim the ends evenly so both match. Hair that dries straight needs light waving with a curling iron and heat protectant, while wavy hair can stay as it is. Wide ribbon overpowers a thin ponytail, so a narrow one works better. Snug the bow against the elastic instead of tying it loosely on top. Carry a spare ribbon for a quick re-tie before dinner.
7. Rhinestone Bow Half Ponytail
Small twisted knot sits at the crown of a half-up ponytail, with a rhinestone bow clip resting just above it. Dark hair with caramel highlights pulls back smoothly from both sides, while the lower hair falls long with curled ends. Sparkle comes from one small point, which keeps the long curled lengths uncluttered. From behind, the bow catches the light above the lower lengths.
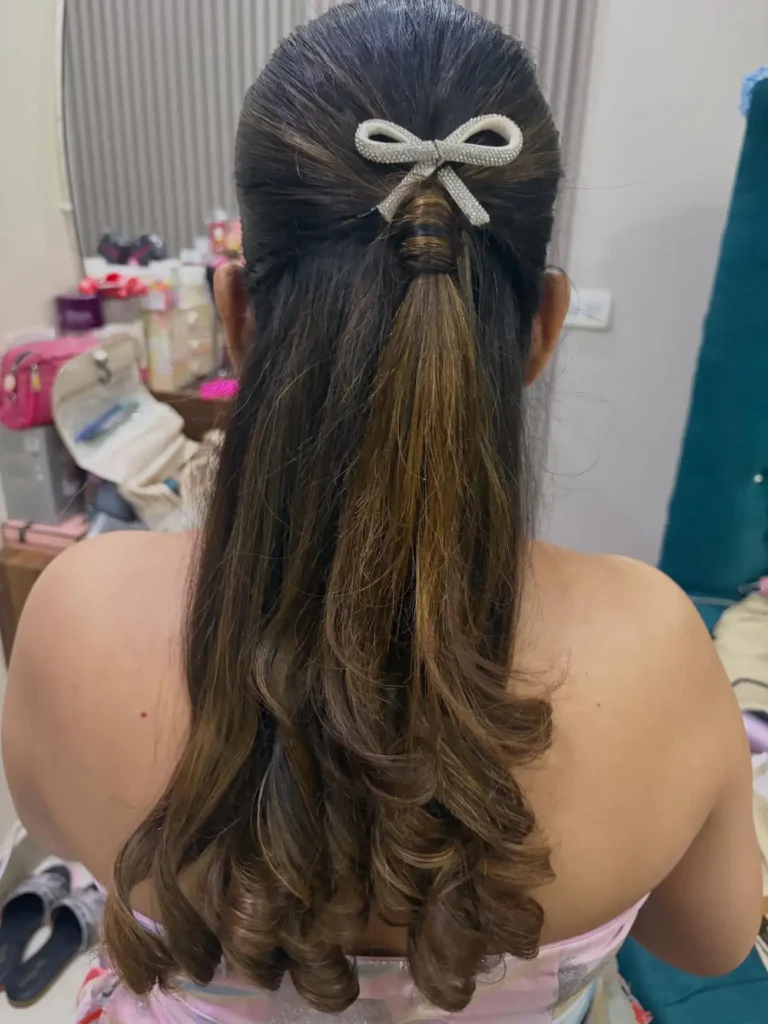
Pin dry hair back from both sides into a small ponytail at the crown. Twist it once, wrap it into a knot, and clip the bow just above. Curl the lower lengths in large sections with a curling iron, protect them with heat spray first, and brush once. Half-up knots loosen under heavy hair, so check the bow after an hour. Keep spray light on the knot, because stiff product on top makes the curls below look rigid.
8. Twisted Wrap Ribbon Ponytail
Rope-like twists run down the back of a high ponytail in highlighted brown hair, narrowing toward the tip. Wrapped hair hides the elastic at the base, and from behind, it creates a neat band above the twisted length. Near the end of the tail, a light blue ribbon bow sits in place. Smooth, lifted hair covers the crown.
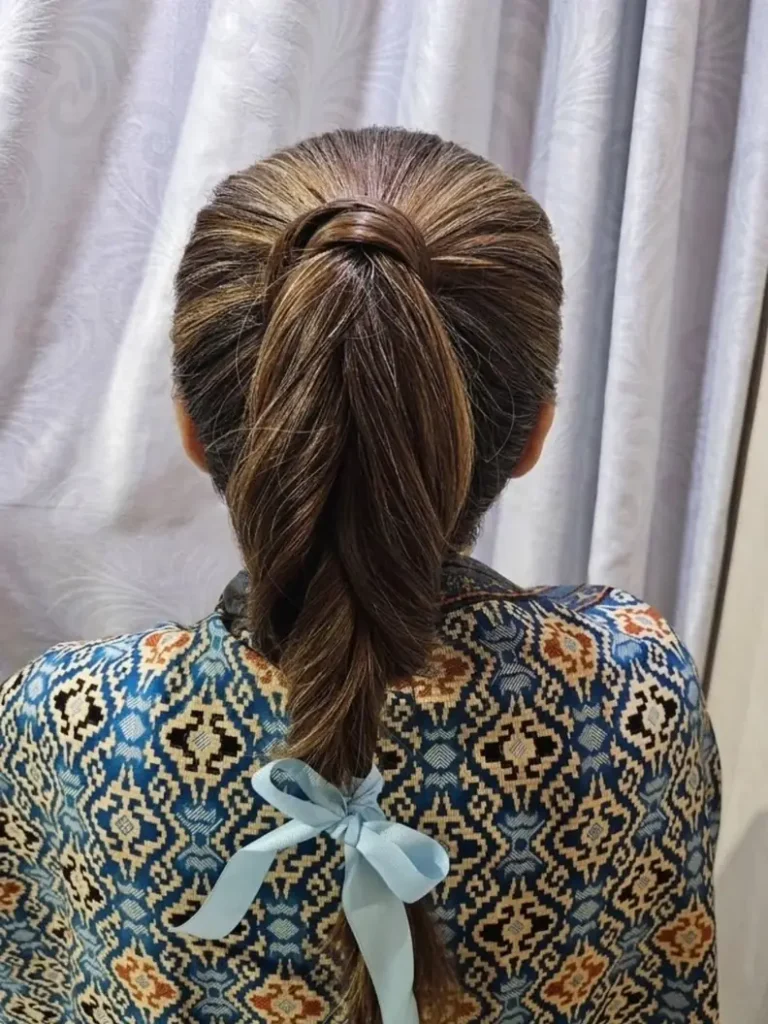
Twist dry hair as you gather it into a high ponytail, then secure it with a strong elastic. Pull a thin strand from the tail, wrap it around the base, and pin the end underneath. Split the tail into two sections and twist them together, then tie the ribbon near the end snugly so the twist cannot unravel. High ponytails slip when you lean forward, so check the wrap before dinner and mist lightly.
9. Pearl Bow Claw Waves
Lower waves fall long with loose curls, parting softly beneath a clip on one side of the crown. Brown hair on top is gathered back into a claw clip shaped like a pearl bow. Smooth top hair keeps all the attention on the clip and its pearls. From the side, the pearl bow stands out against the brown waves.
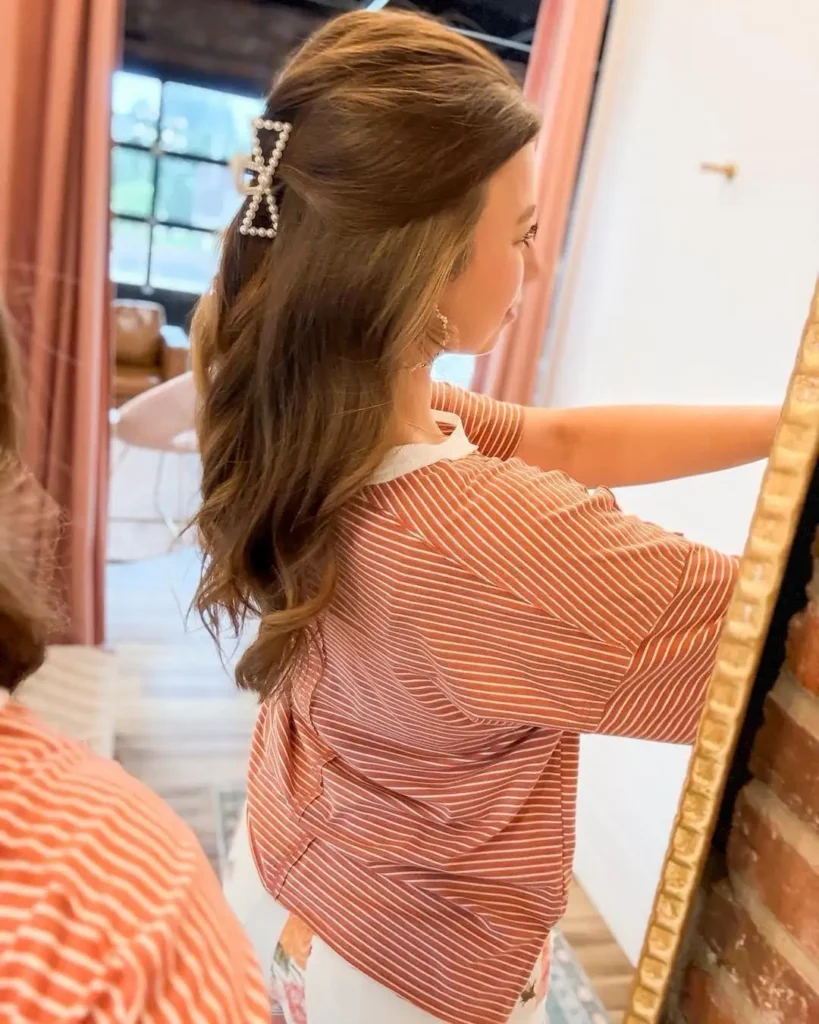
Smooth the gathered top section with a brush, open the claw wide, and clamp it over the hair. Wave straight pieces in two large sections, using heat protectant before the iron. Thick waves can push a single claw out, so carry one spare clip. Securing a thinner section inside the clip holds more firmly than one big handful, because less hair means less weight pulling on the teeth. Turn your head to test the hold and mist lightly.
10. Large Black Bow Ponytail
Bow ends hang long beside a low, straight dark ponytail, and the wide black satin shows a clear shine. From behind, the bow spans wider than the ponytail itself. Hair pulls back smoothly from the crown without a visible parting, and the tail falls evenly down the back. Straight lines dominate everything except the bow, which is the one wide shape.
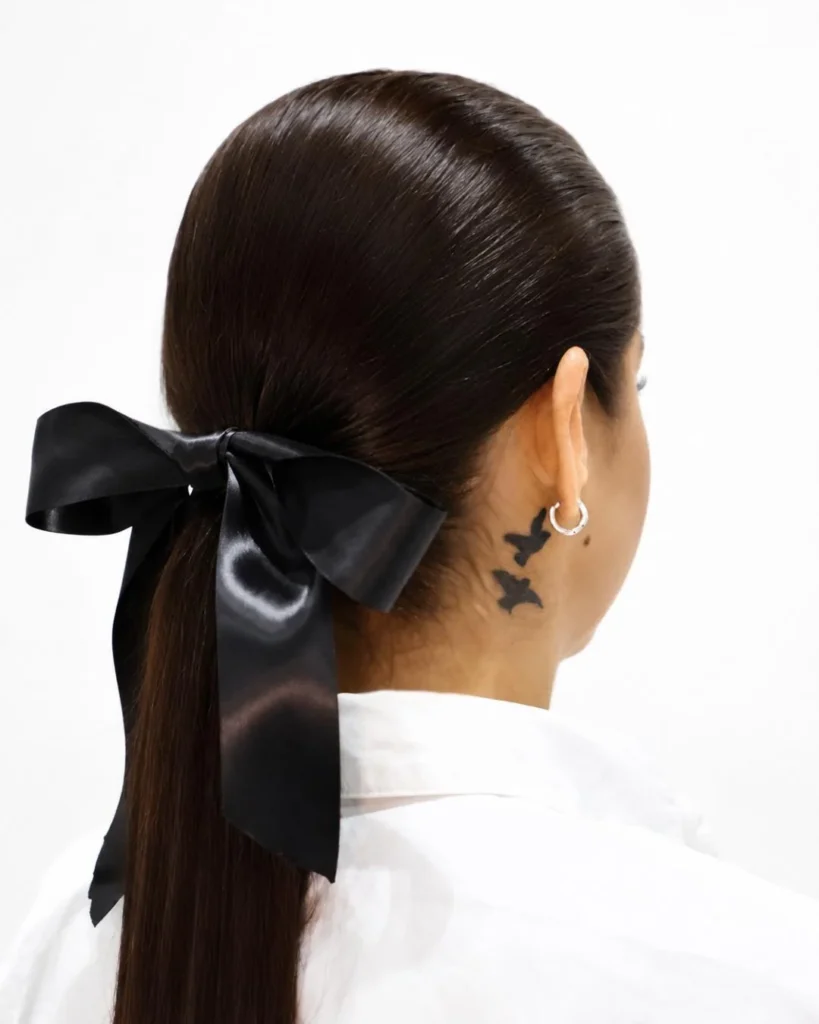
Secure dry hair with a plain elastic first, then tie a wide ribbon around the base, form two even loops, and pull the ends long. Shape the loops with your fingers after tying, which keeps them balanced. Bent pieces can be straightened with a flat iron on low heat, using heat protectant first. Skip gel at the crown, because dark hair shows visible marks where gel dries. Mist lightly, then check the bow before photos.
11. Blonde Twisted Pearl Bun
Tendrils curl beside the neck below a low twisted bun in blonde highlighted hair. Its twist sweeps from one side across the nape, and the crown stays smooth with a side sweep. Small pearl pins decorate the bun at two points, and the bun itself looks full and slightly uneven. From behind, the twist forms a wide band above the rounded bun.
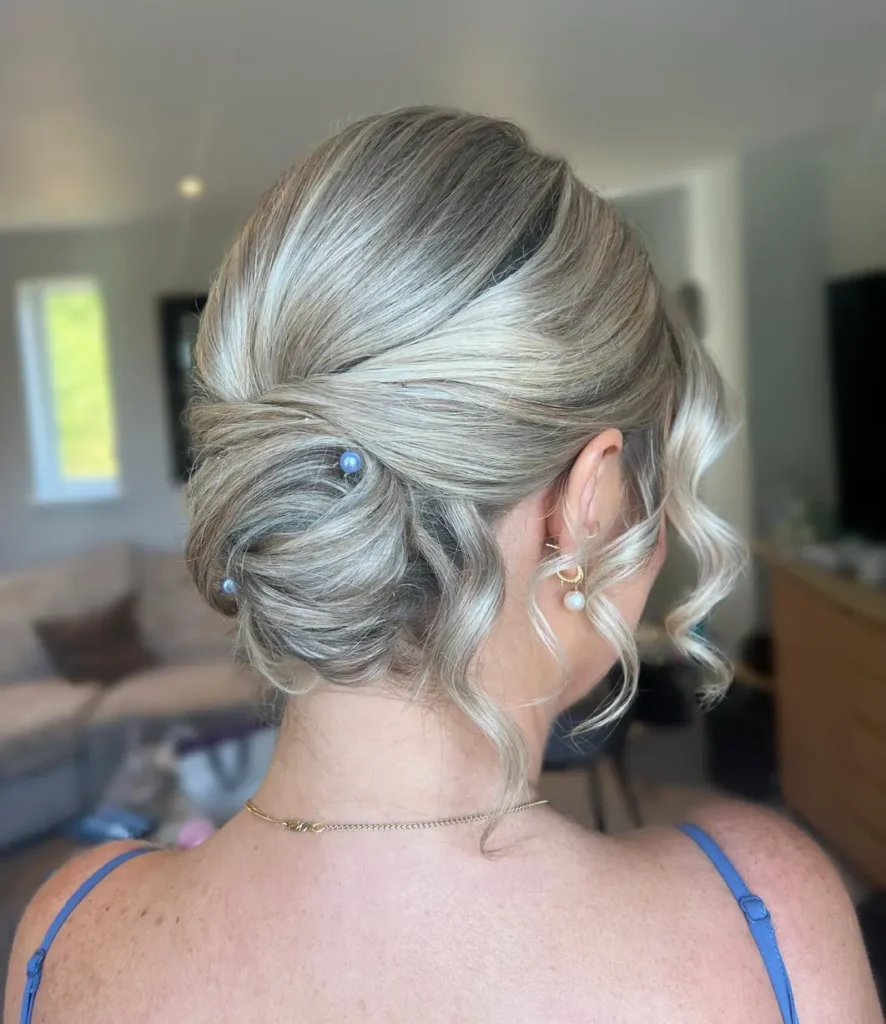
Sweep dry hair to one side and gather it low at the nape. Twist the length once, coil it into a bun, and pin it from four directions, which spreads the hold so the bun resists sliding. Pull out two thin tendrils and curl them lightly with a small-barrel iron, using heat protectant first. Press the pearl pins in last. Curled tendrils keep the neckline softly framed. Twisted buns loosen when you lean back, so check the pins after dinner starts.
12. Rounded Pearl Cluster Bun
Pearls and small white flowers form a cluster across the top of a rounded low bun in black hair. Small pearls also decorate the sides. Hair pulls back smoothly at the crown, and the bun forms a neat round shape at the nape. From behind, the round bun sits clearly below the pearl cluster, so the back view has two clear layers.
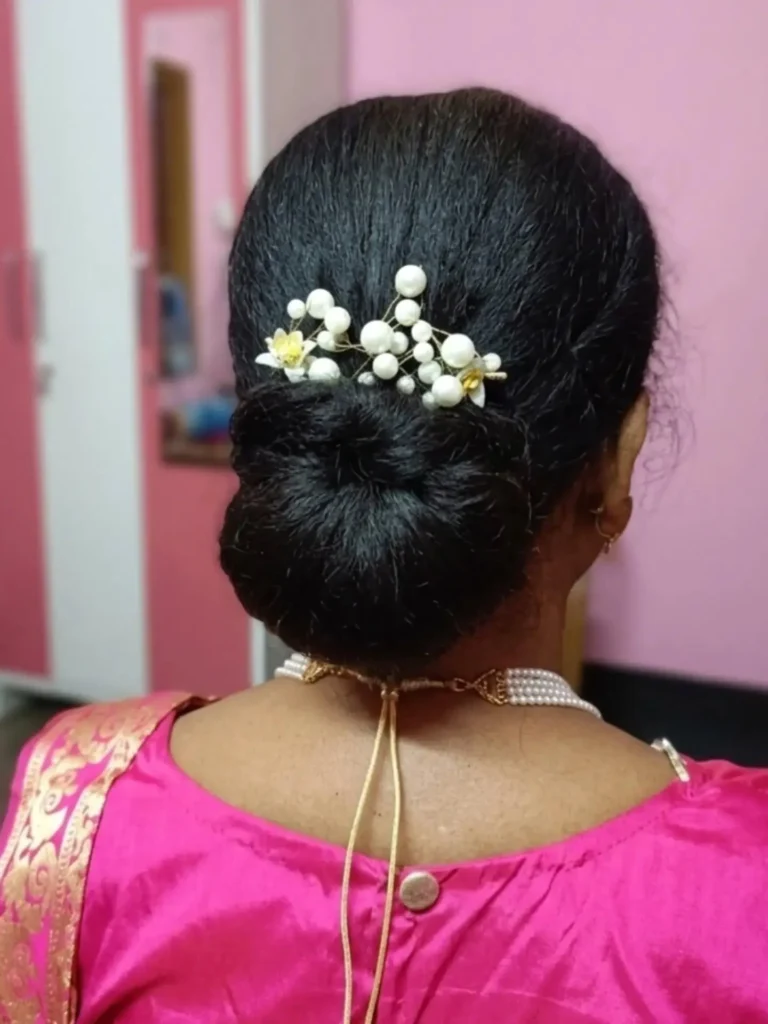
Shape dry hair into a low ponytail, twist the tail once, and coil it around its base. Coiling evenly keeps the bun round, because uneven coils pull the shape sideways. Pin from four directions, then press the cluster into the top. Keep heavy spray off the pearls, since it dulls their shine. Carry two spare pins in case the cluster tips. Very fine or slippery hair may need an extra pin, which means more anchor points for the coil.
13. Braided Frame Pearl Bun
Plaits frame a low bun from both sides, meeting it low at the nape in dark hair. Pearl pins decorate the braids at three points, while a curled strand falls beside one side. Center part runs clean through the crown, which stays smooth. From behind, the braids create a frame around the bun, which sits round and low.
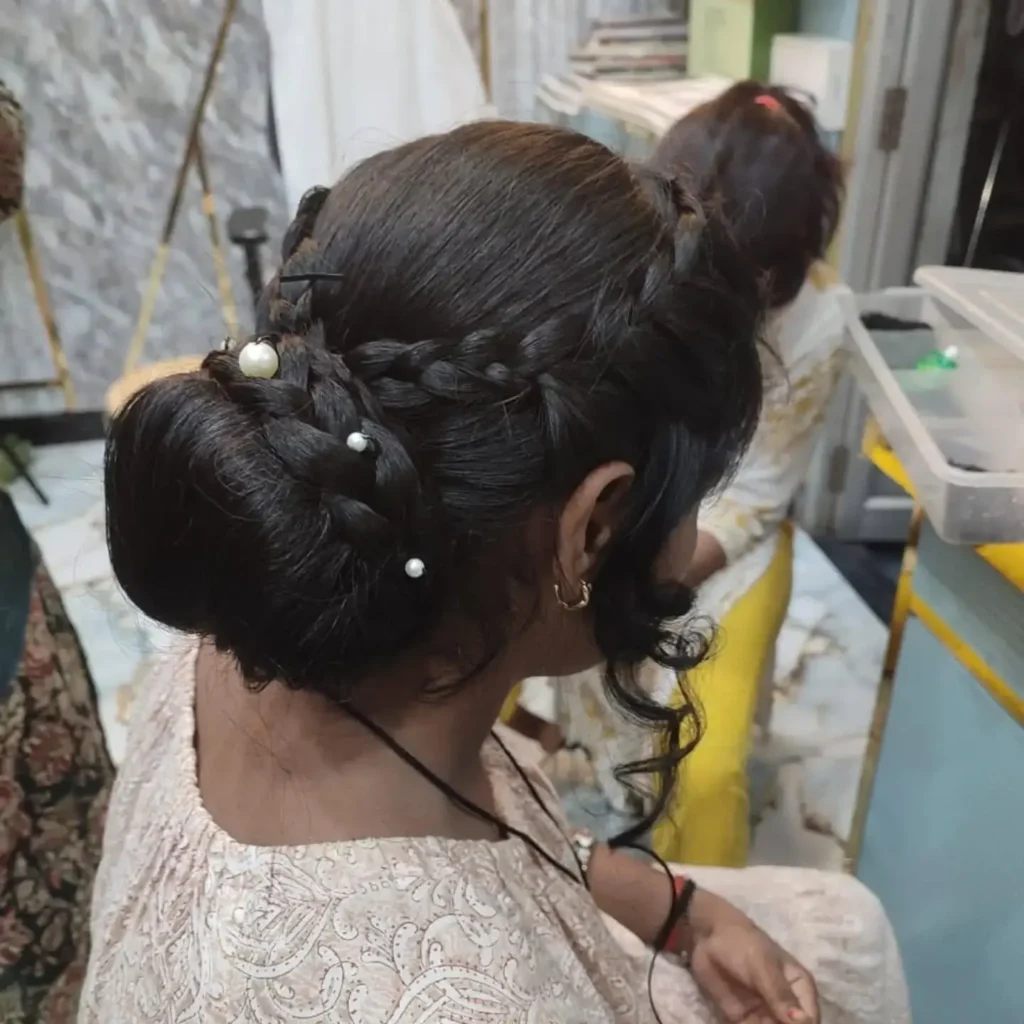
Braid two dry side sections back toward the nape, then gather all remaining hair low and coil it into a bun. Pin the braids over the bun edges, and secure each braid at both ends. Short braids can slip out of pins, so check the braid ends before dinner. Press the pearl pins along each braid last, leaving one curled strand free; use heat protectant if you curl it with an iron. Mist lightly to calm flyaways.
14. Striped Scarf Knot Ponytail
Mustard, blue, and cream stripes cross a scarf at the base of a low ponytail. Light brown hair pulls back smoothly, and the tail falls straight with even ends. Its knot sits off-center at the nape, and the ends hang long beside the tail. From behind, the striped scarf frames the straight ponytail and adds color to the back view.
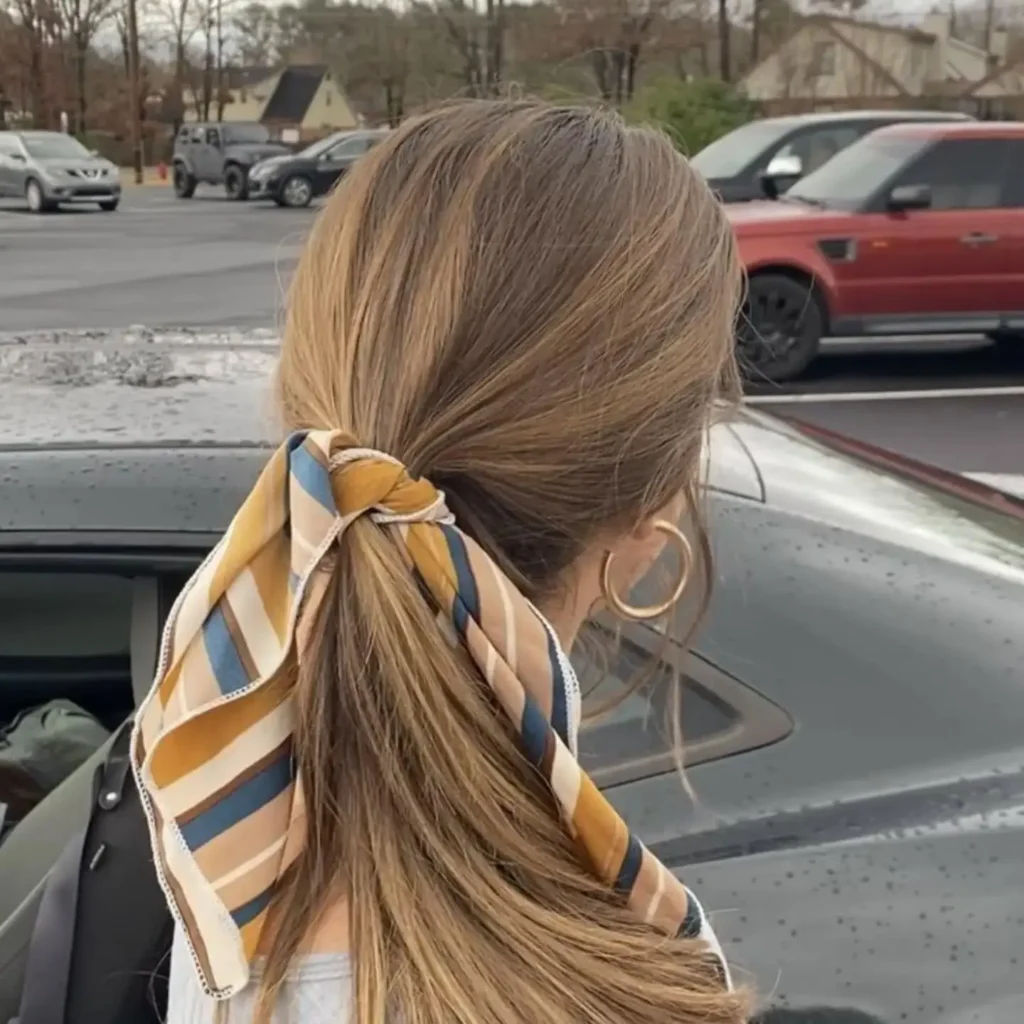
Fold a square scarf into a band and wrap it twice around the elastic before knotting, because the extra turn gives silk something to grip. Plain elastic goes on first, over smooth, dry hair, before the scarf is folded. Silk can loosen during a long meal, so check the knot after an hour. Smooth the crown with a brush and mist lightly. Slippery or very fine hair usually needs the double wrap most.
15. Floral Scarf Bow Ponytail
Wide bow loops sit at the nape of a low ponytail, with long scarf ends hanging beside the tail. Red, pink, teal, and orange petals cover the whole scarf. Dark straight hair pulls back smoothly from the crown, and the tail falls straight down the back. From behind, the bright bow stands out sharply against the dark hair.
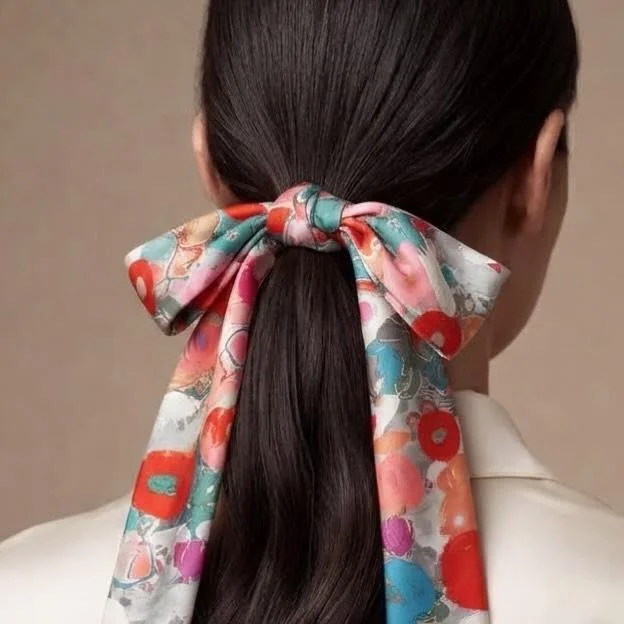
Arrange dry hair into a low ponytail with a plain elastic, then fold the scarf into a band and wrap it around the base. Tie a bow with even loops and pull the ends long. One loop usually droops first, so tug the shorter one gently to balance both sides, and check the bow before photos. Skip extra accessories, because a printed bow already holds all the attention. Smooth the crown, then mist lightly.
16. Grey Scarf Wrap Ponytail
Silk wraps the base of a low blonde ponytail, and one long grey scarf end hangs beside the tail. Wavy ends finish the short tail, while hair at the crown pulls back smoothly. Fabric covers the elastic fully, so no tie shows at the nape. From behind, the grey fabric forms a wide band above the short ponytail.
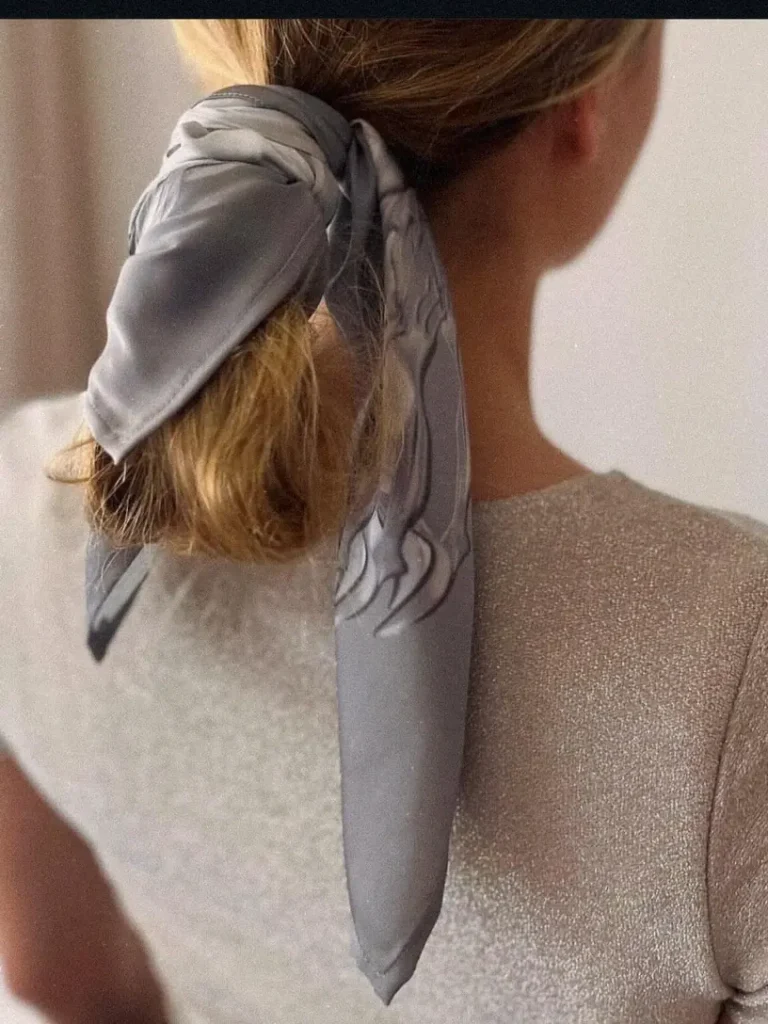
Gather dry hair into a low ponytail with a plain elastic, then fold the silk into a band. Wrap it twice around the base and tuck the end underneath. Low ties shift when you lean back, so check the wrap after sitting. Wrapping too tightly can crease silk and flatten the tail, which means a snug but gentle pull works better. Wave the ends lightly with a curling iron and heat protectant, then mist with light spray.
17. High Floral Scarf Ponytail
Floral scarf ends fall past the shoulders and frame a high ponytail of wavy brown hair. Wide waves run down the tail, with loose strands near the sides. Hair gathers high on the crown, and a scarf bow marks the base where the ends begin. From the side, the black floral print stands out clearly against the brown waves.
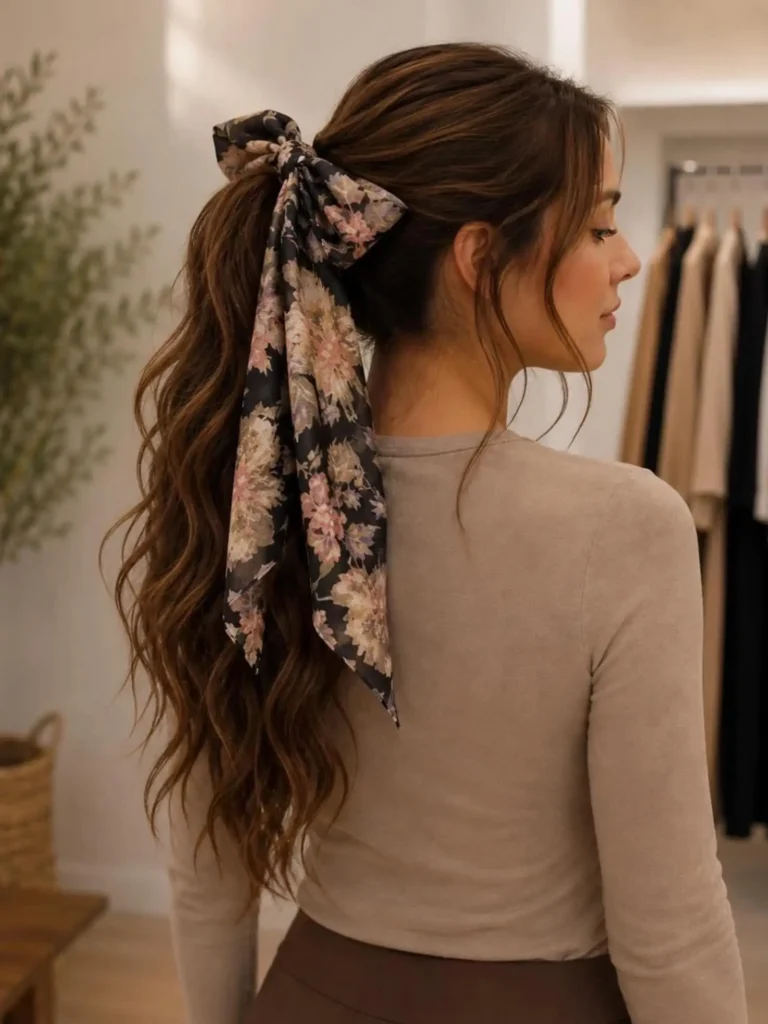
Raise dry hair into a high ponytail with a strong elastic, then wrap the folded scarf around the base and tie a bow with long ends. Curl the tail in three large sections, brush the waves once, and mist lightly. Use heat protectant before the iron. High ties can slip faster than low ones, so check the elastic before dinner. Backcomb one small crown section before gathering, because teased roots hold height better than smooth ones.
18. Vertical Pearl Claw Half-Up
Pearls line a clear claw clip set vertically at the center back of half-up dark hair. Top hair pulls back smoothly into the clip, while the lower hair falls straight with a gentle wave at the ends. Lower lengths part softly below the gathered section, leaving the clip in clear view. From behind, the pearl line runs straight down the clip.
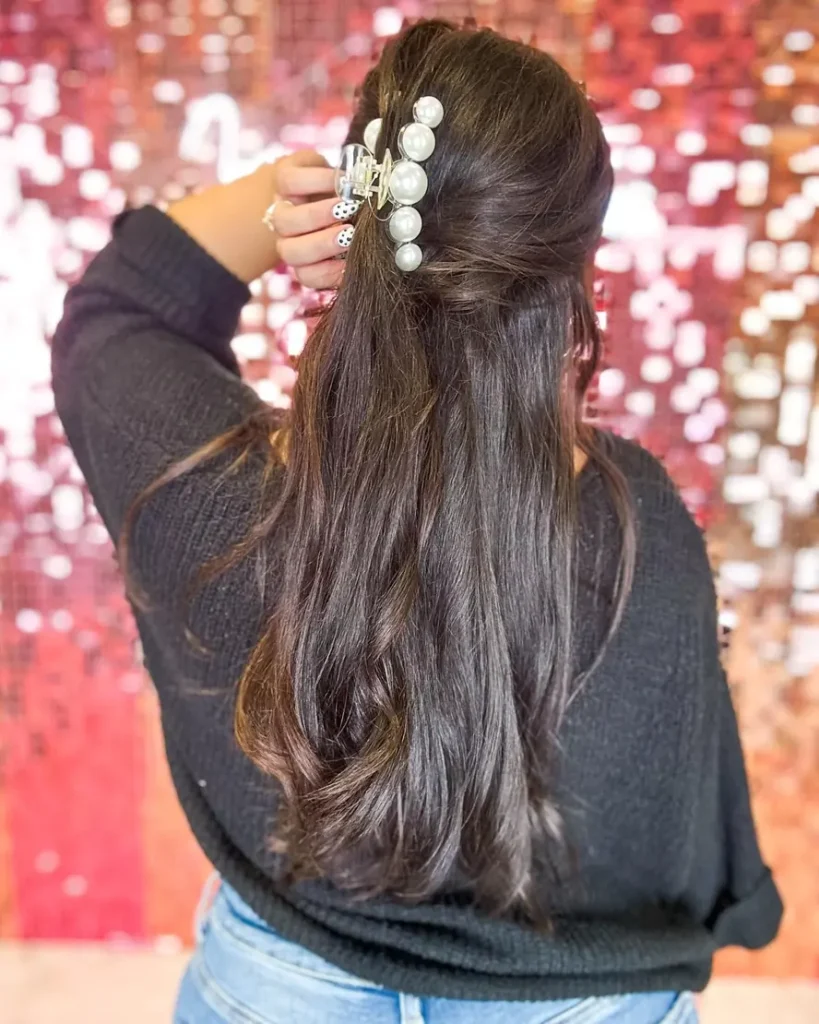
Brush the top section of dry hair smooth, open the claw, and clamp it vertically over the gathered hair. Clamp close to the crown, not low on the tail, so the clip sits straight instead of tipping. Thick hair can tip a vertical clip, so carry a spare. Straighten bent ends on low heat after applying heat protectant, then mist lightly and turn your head to test the hold before dinner.
19. Sheer Scarf Bow Ponytail
Muted green and brown tones run through a sheer scarf tied in a large bow at a low ponytail. Dark wavy hair pulls back smoothly, and the tail falls with curled ends below the bow. Wide, lightweight loops sit at the base, while scarf ends frame the tail on both sides. From behind, the sheer bow looks larger than the ponytail base.
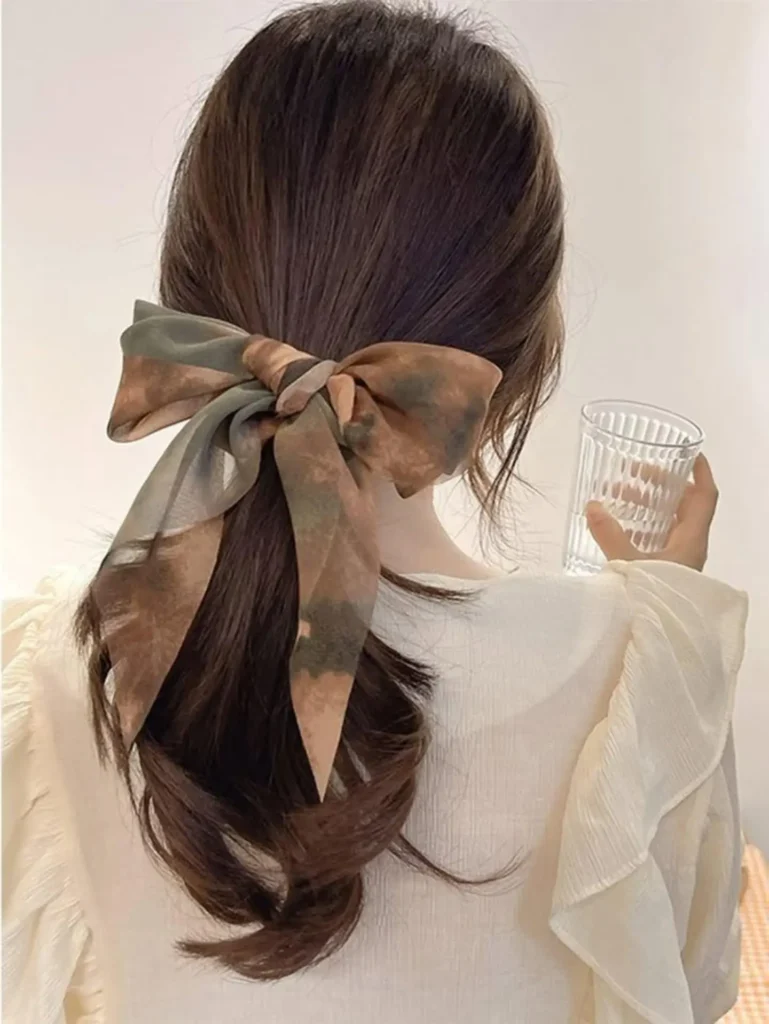
Thin fabric gives the bow its light shape, so heavy scarves would weigh it down. Gather dry hair into a low ponytail with a plain elastic, fold the scarf into a band, and wrap it around the base. Tie a large bow with even loops, then fluff the loops once to keep them full. Curl the tail ends lightly with a curling iron and heat protectant. Mist with light spray and check the bow before photos.
20. Gold Claw Curly Half-Up
Defined coils fall long below a gold rectangular claw clip in dark curly hair, with plenty of volume. Top section lifts back from the sides, and the clip sits at an angle on the crown. Curls part loosely below it and move freely as the head turns. From behind, the gold clip stands out against the dark curls.
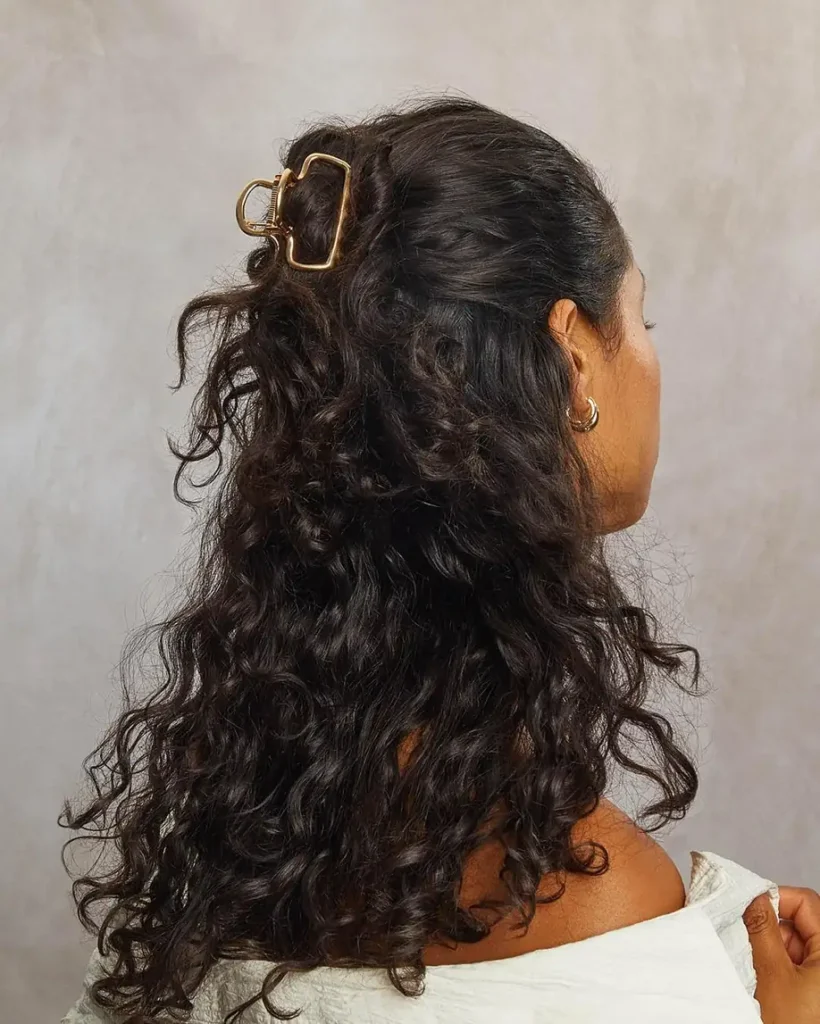
Work a small amount of curl cream through the lengths only, keeping it off the roots so the crown can lift. Gather the top section back, lift it slightly, and clamp the claw over it. Scrunch the lower curls once and mist lightly. Curls shrink as they dry, so judge length once hair is dry. Brushing dry curls breaks up the coil pattern and causes frizz, so refresh them after dinner by scrunching with damp hands instead.
21. Flower Charm Claw Half-Up
Charms dangle beside a clear claw clip, with a pink flower charm and a white bead charm hanging free near the twist. Straight black hair is half-up, with the top section twisted to one side. Lower hair falls straight with a slight wave, and the crown stays smooth. From behind, the charms sit neatly against the dark hair.
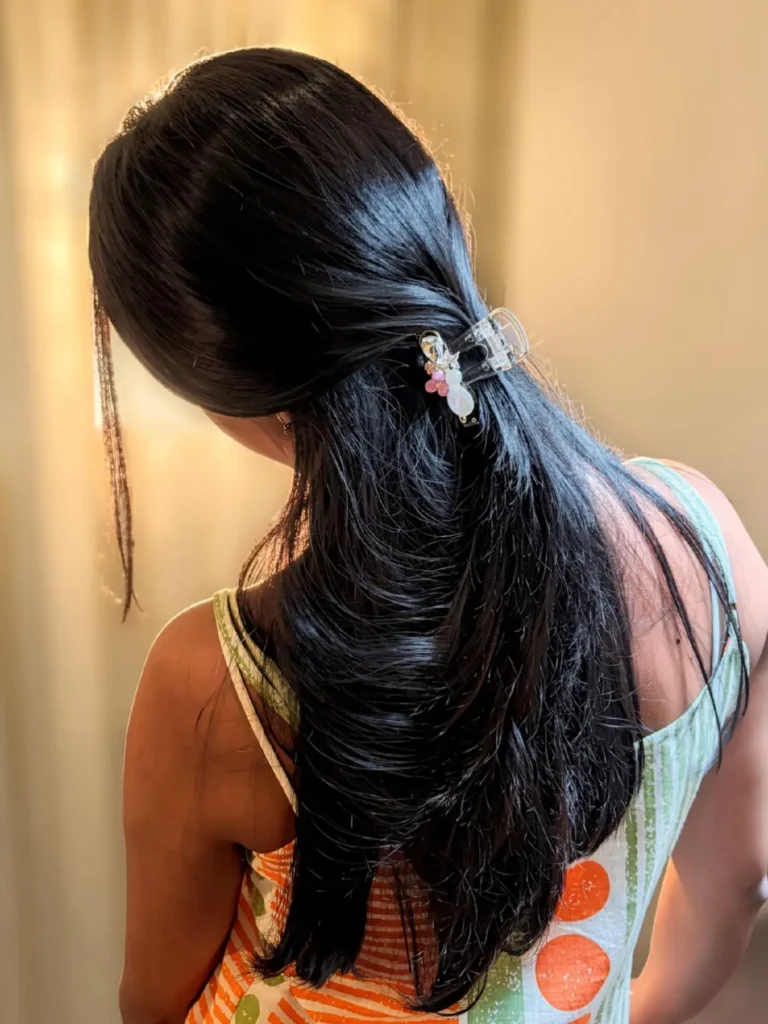
Twist the top section of dry hair to one side to start the half-up shape. Clamp the clip over a thin twist, which keeps the charms visible instead of buried in hair. Charm clips can feel heavy on fine hair and slip, so check the hold after an hour and carry a spare. Straighten bent ends on low heat with heat protectant, mist lightly, and smooth the crown with a brush.
22. Butterfly Claw Wavy Half-Up
Translucent butterfly wings spread across a claw clip on one side at the back of the head. Wavy brown hair is half-up, with the top section twisted back from the crown. Lower waves fall long and end in curls, parting softly below the clip. From behind, the butterfly shape stands out clearly against the long brown waves.
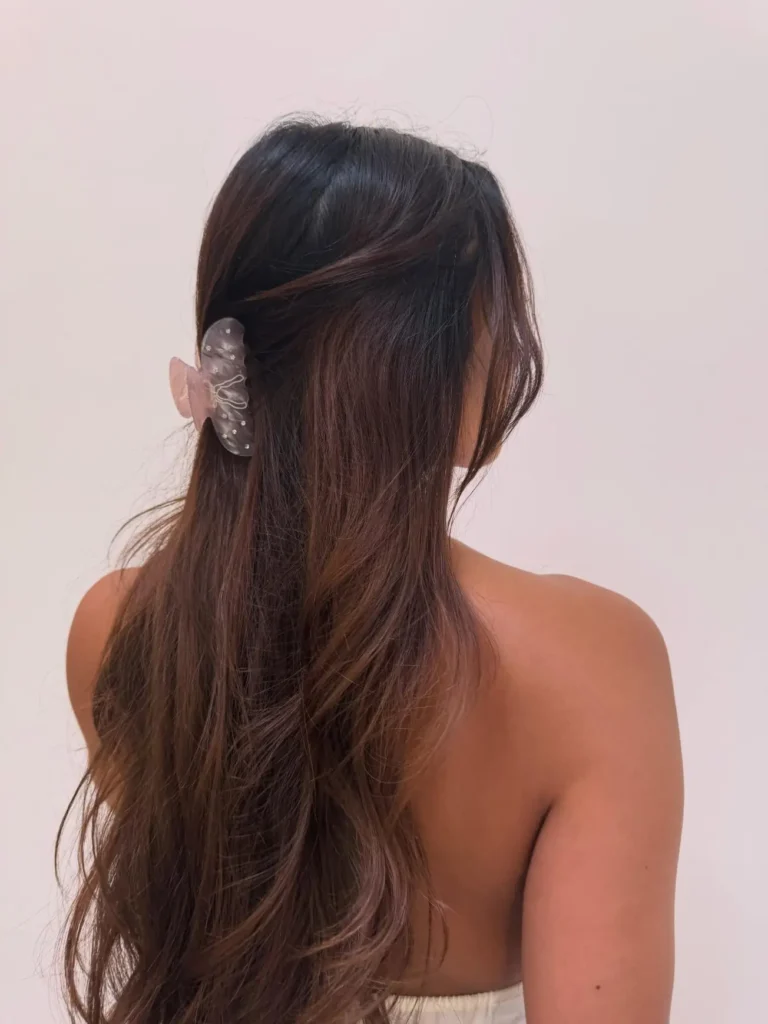
Collect the top section of dry hair and twist it once toward the back. Open the butterfly claw wide before clamping, since a narrow opening can catch strands and pull them. Wet hair loosens the hold as it dries, so wait until the hair is dry before clipping. Wave straight pieces in two large sections with a curling iron and heat protectant. Hugging guests can loosen a half-up twist, so check it afterward and test the clip by turning your head.
23. Yellow Side Claw Half-Up
Bright yellow marks one small spot on the side of half-up blonde hair, where a mini claw clip holds a twisted section. Top hair pulls back smoothly, and the lower hair falls straight with wavy ends. Twisted section runs into the clip from the side. From behind, the yellow clip adds a bright point above the long lengths.
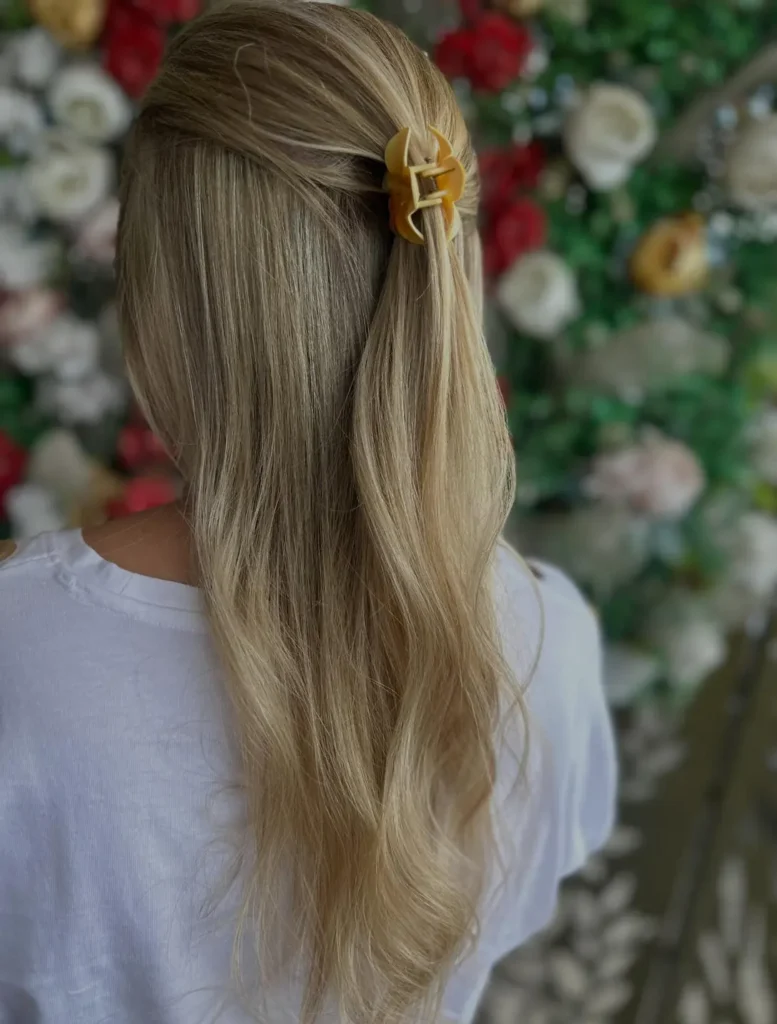
Smooth the top section of dry hair back with a brush. Twist one side section toward the back, pin its end underneath, and clamp the mini claw over it. Small twists need small holds, so large clips would swallow the twist and slide. Thick hair may need a firmer hold, because one mini claw grips only a small amount. Wave the ends lightly with heat protectant first, mist with light spray, and check the clip before dinner.
24. Blue Claw Crimped Half-Up
Crimps run through blonde hair, and the lower lengths fall in crimped waves with uneven ends. Top hair pulls back smoothly into a light blue claw clip set with rhinestones. Clip sits on one side at the back, and the lengths part below it. From the side, the blue clip stands out against the blonde hair.
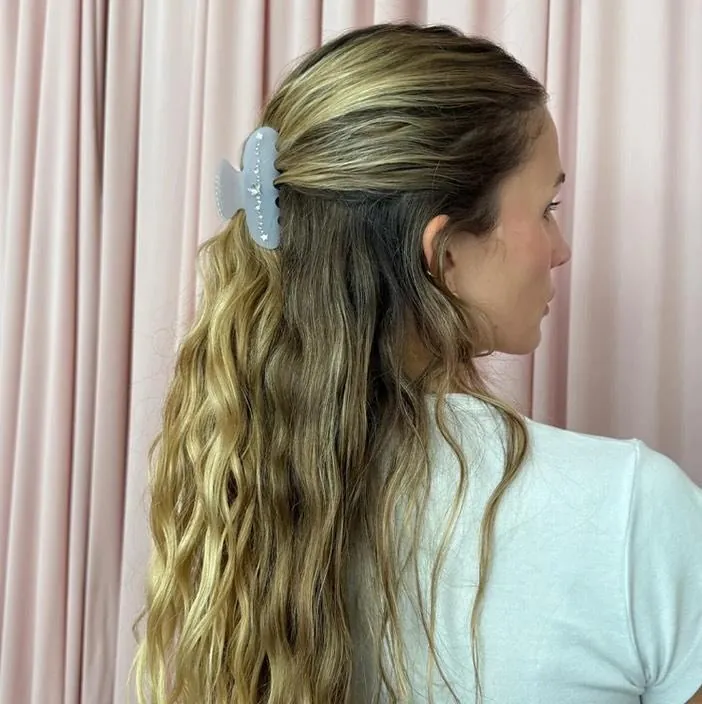
Crimp the lower lengths in small sections while hair is dry, using heat protectant first, since crimping irons press hair at high heat. Pull the top section back, smooth it with a brush, and clamp the clip over it. Re-crimp only the top wave layer after dinner, which restores texture without heating every piece again. Brushing flattens the ridges, so skip the brush on the crimped lengths. Test the clip by turning your head, and mist lightly.
25. Side Cornrow High Ponytail
Flat against the scalp, a cornrow runs from the side of the head into the base of a high ponytail in black hair. Loose waves fall long from the high tail, growing looser toward the ends. Crown stays smooth on the unbraided side. From the side, the cornrow makes a clear line into the ponytail base.
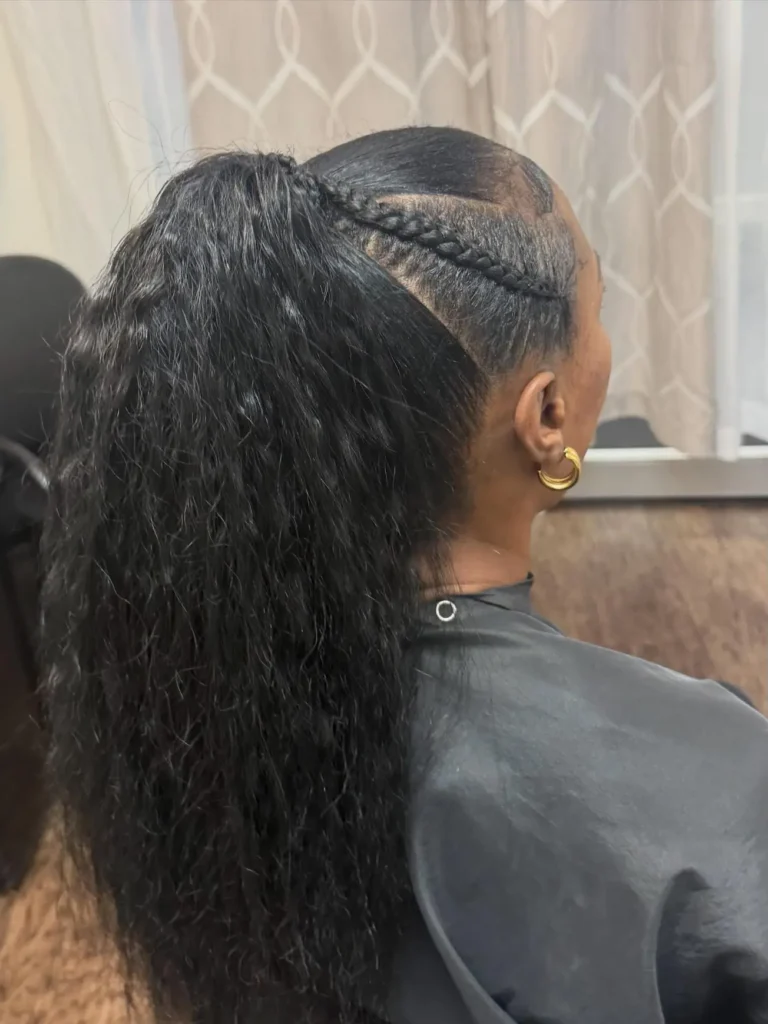
Braid one dry side section into a cornrow toward the crown, working snugly against the scalp. Pulling hard makes the braid lines uneven and the scalp sore, so keep tension firm but comfortable. Gather all hair high with a strong elastic and let the waves fall. Smooth the unbraided side with a brush, mist lightly, and check the braid before dinner. Add a little oil to the braided section if it feels dry.
Conclusion
Prep matters more than skill when holiday hair has to be quick. Test your favorite style once before the day, and note which tie or accessory slips first. Almost every look among these easy cute Thanksgiving hairstyles needs only a small kit: one elastic, one clip or scarf, two pins, and a travel spray. Fixing the weak spot ahead of time means dinner day needs no guesswork. Ponytails, soft buns, and decorated half-up styles finish a dinner outfit without taking time from family and guests.
