

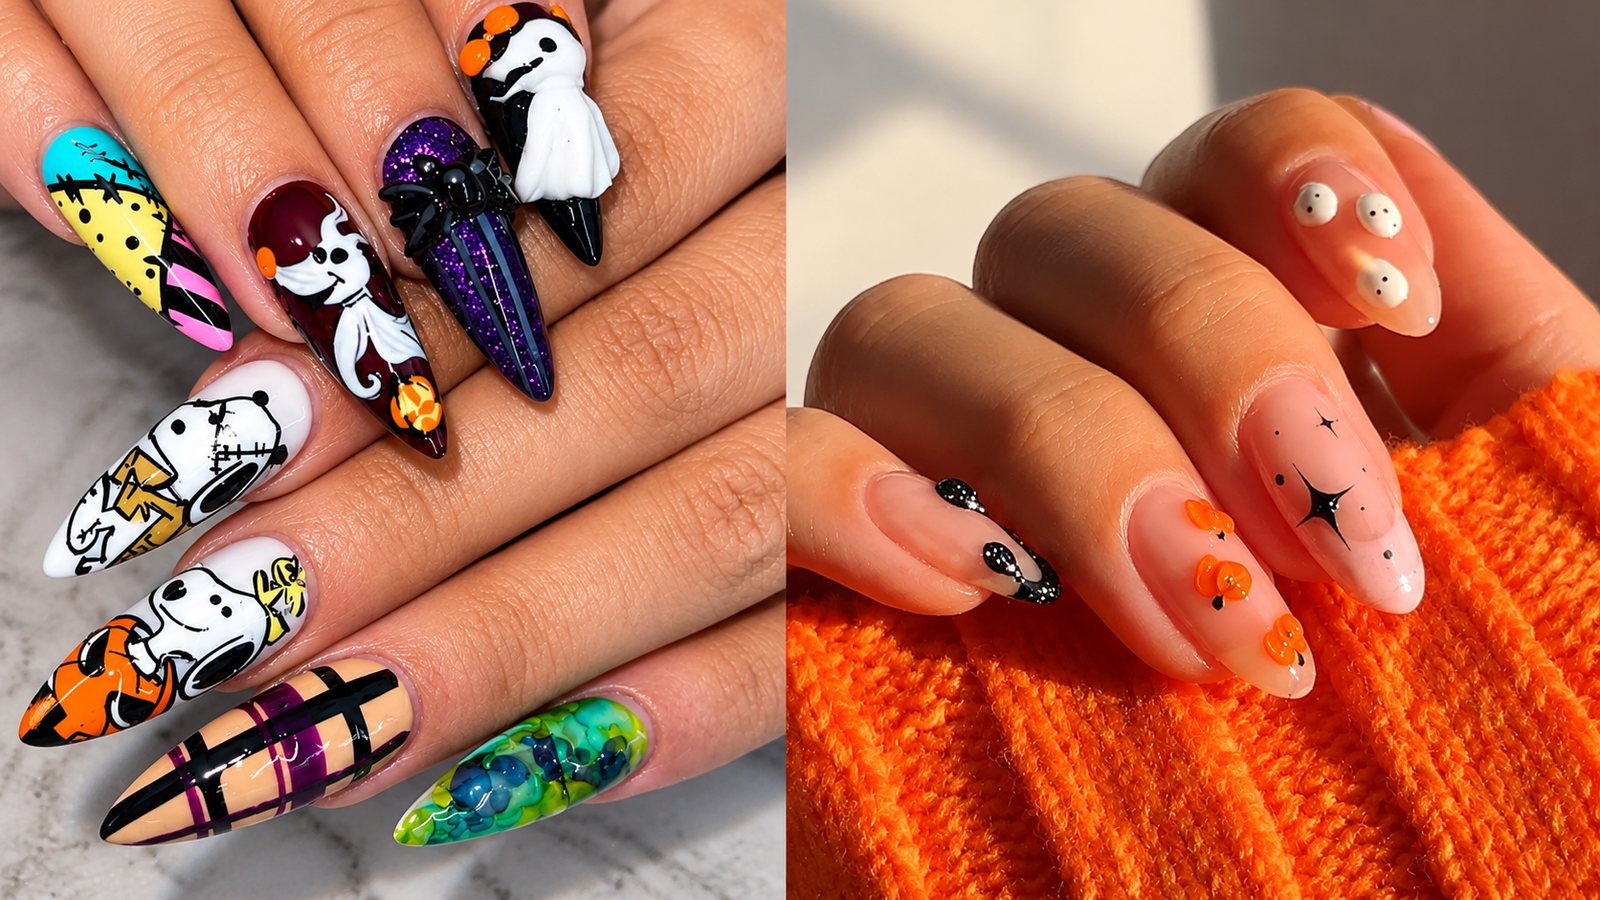
Halloween is the perfect time to try something creative with your manicure and explore designs that go beyond ordinary nail polish. 3D Halloween Nails bring spooky characters, raised decorations, and eye-catching textures to life, making your nails feel like tiny works of art. From cute little ghosts and sculpted pumpkins to creepy spiders and gothic charms, dimensional nail art offers plenty of ways to celebrate the season while showing off your personal style.
One of the best things about three-dimensional Halloween nail designs is their versatility. You can choose soft nude shades with delicate ghost accents, bold orange and black combinations, or dramatic burgundy nails with metallic decorations. Some styles look playful and cute, while others create a darker, more mysterious mood. Nail length also makes a difference, as shorter nails can feature small raised details while longer shapes offer more space for elaborate artwork.
1. Spooky 3D Ghosts
Cute little ghosts can turn an ordinary manicure into a playful Halloween look. Sculpt rounded ghost shapes with white or milky gel, giving each figure a slightly different outline to create a more natural appearance. Tiny black eyes and small mouths add personality without making the design too complicated. Pair the ghosts with sheer pink, lavender, or pale gray polish for a softer finish. Keeping the raised figures on two or three accent nails helps maintain a balanced design that feels fun and wearable.
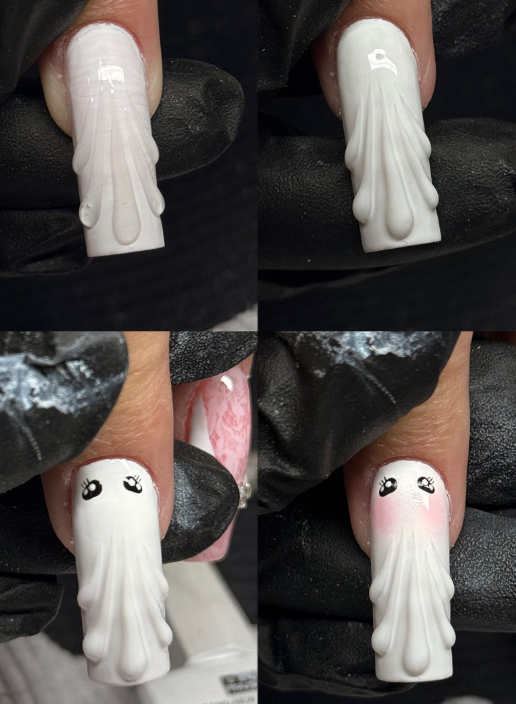
Credit by: sculptedbyjmg
2. Raised Pumpkin Details
Mini pumpkins bring warm autumn colors and classic Halloween charm to your manicure. Use orange sculpting gel to build rounded shapes, then add curved grooves and tiny green stems to make each pumpkin recognizable. Cream, beige, and transparent bases allow the raised decorations to stand out beautifully. For extra seasonal detail, include delicate brown vines or small gold leaves on neighboring nails. Smaller pumpkin designs work well on short nails, while longer almond or coffin shapes provide additional room for more detailed artwork.
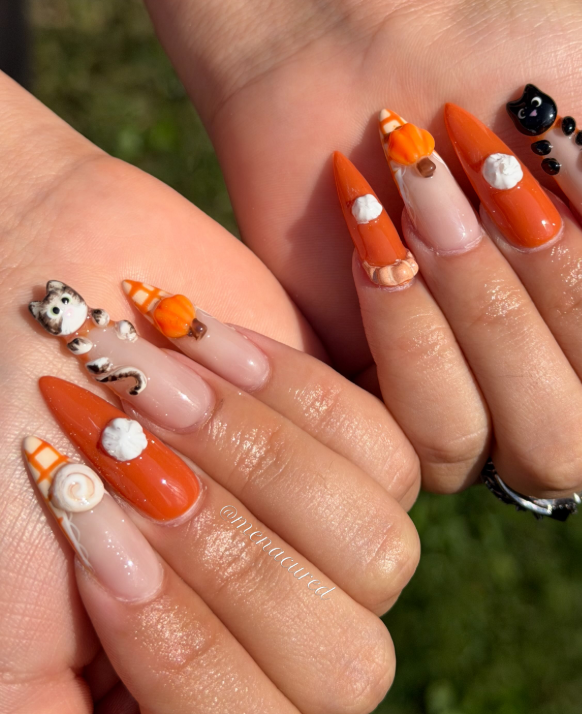
Credit by: menacured
3. 3D Black Cat Charms
Black cat decorations offer a mysterious yet adorable option for Halloween nail art. Choose sculpted cat faces with pointed ears, tiny whiskers, and bright green or amber eyes for a distinctive appearance. Black charms look especially striking against nude, silver, or soft pink polish, while a deep purple base creates a more magical atmosphere. Crescent moons and miniature stars can complete the theme without overcrowding the manicure. Place one cat charm on each hand or use a single statement piece for a simpler, more practical look.
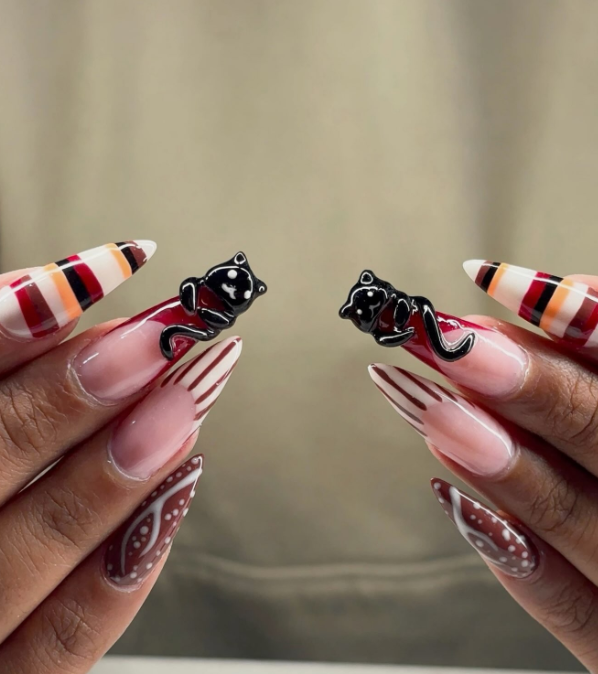
Credit by: sianailsandspa
4. Gothic 3D Webs
Raised spiderwebs are perfect for creating a dramatic manicure with a gothic edge. Fine black gel lines can form delicate web patterns over burgundy, charcoal, smoky purple, or sheer nude polish. Adding a few thicker sections creates texture and makes the design stand out from ordinary painted webs. Small silver studs or a tiny spider decoration can provide extra detail. Leave enough space between the raised lines to keep the pattern clear, and combine one or two web-covered nails with solid colors for a polished finish.
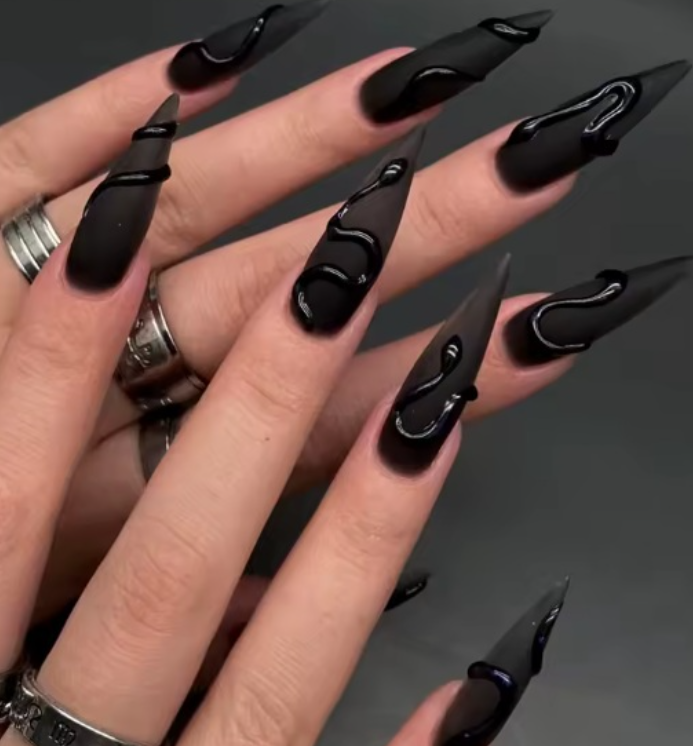
Credit by: pickora_hub
5. Bloody Drip Accents
Red drip details create a bold Halloween manicure inspired by classic horror themes. Sculpt small drops of crimson or cherry-red gel near the tips, allowing the shapes to flow downward in different lengths. White, pale pink, and black bases provide strong contrast and make the raised details more noticeable. For a dramatic effect, combine the drips with dark burgundy polish on the remaining fingers. Keeping the design limited to a few nails creates visual balance while still delivering a striking, spooky appearance for Halloween celebrations.
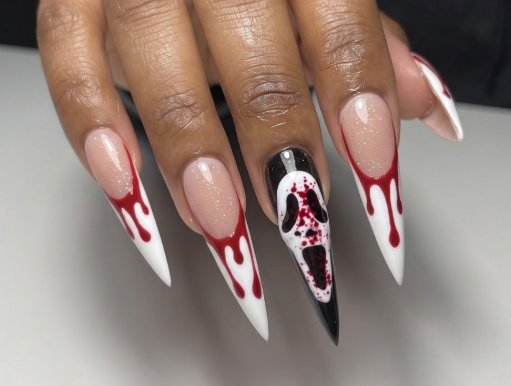
Credit by: honolulunails318
6. 3D Witch Hat Nails
Tiny witch hats add a magical touch to seasonal nail art without requiring an elaborate design. Shape pointed hats from black, deep purple, or midnight-blue gel, then decorate them with narrow orange bands or small metallic buckles. A sheer nude base makes the sculpted details easy to notice, while a dark background creates a moodier finish. Little stars, moons, or sparkles can complement the hats on neighboring nails. Choose compact decorations that sit comfortably on the nail surface, especially if you plan to wear the manicure throughout the week.
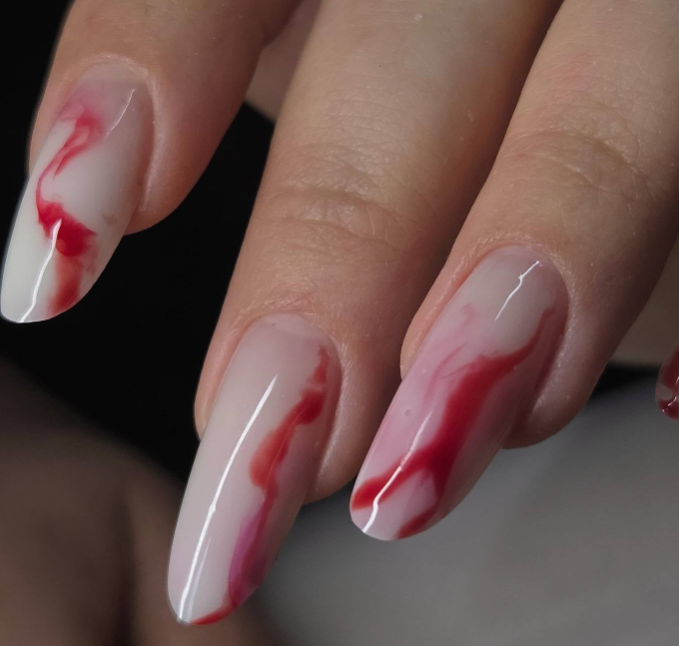
Credit by: naildbyloz
7. Creepy Eyeball Embellishments
Raised eyeballs create an unusual Halloween manicure that immediately catches attention. Build small white spheres with sculpting gel, then add colored irises and dark pupils to give each eye a distinctive expression. Fine red lines can make the design look creepier, while blue or green irises introduce a playful pop of color. Smoky gray, nude, and black backgrounds work particularly well with these decorations. For a more wearable version, place one or two eyeballs on accent nails and keep the rest of the manicure simple.
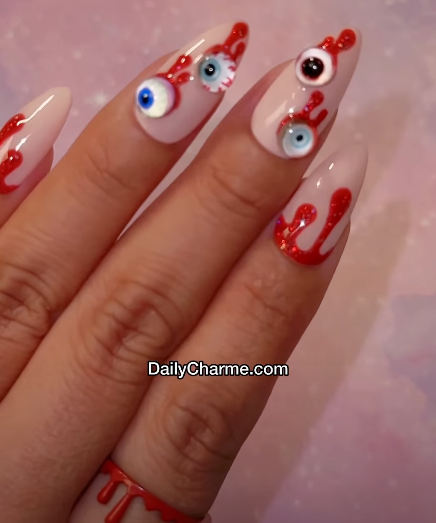
Credit by: daily_charme
8. Sculpted Halloween Bats
Three-dimensional bats bring a spooky nighttime theme to your fingertips. Black sculpting gel works well for the body and pointed wings, while purple or silver details can add a little extra character. Position the bats at different angles instead of repeating the same shape on every nail, creating a more dynamic arrangement. A sheer base gives the manicure a lighter appearance, whereas midnight blue or charcoal polish creates a dramatic background. Small stars and crescent moons can complete the design without taking attention away from the raised bats.
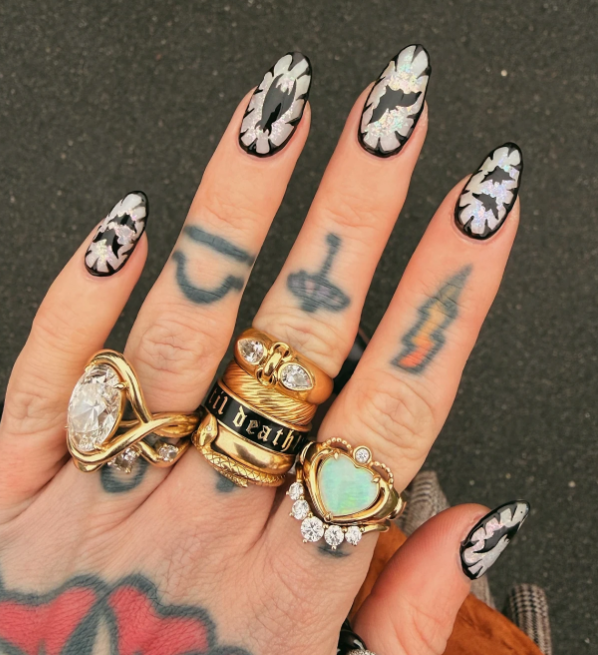
Credit by: bhambnails
9. 3D Skull Accents
Sculpted skulls are a great choice for anyone who enjoys darker Halloween styles. Use ivory, white, or metallic silver gel to shape the skulls, then add dark details around the eyes, nose, and teeth. Matte black, deep red, and smoky gray polish provide a strong contrast that makes the raised shapes stand out. Short nails can feature one small skull, while longer nails allow more room for intricate details. Keep surrounding decorations minimal so the skull remains the main feature of your manicure.
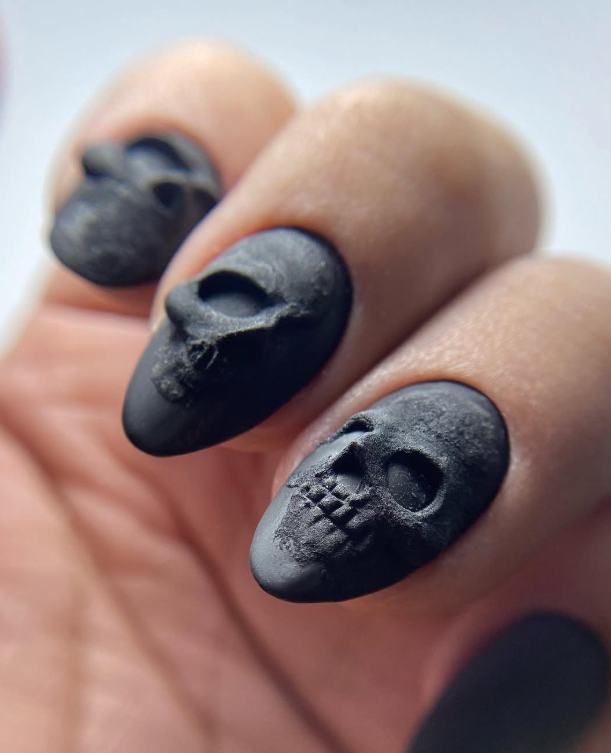
Credit by: tonnyrgzt.on
10. Haunted Graveyard Nails
A miniature graveyard creates a spooky scene filled with tiny tombstones, crooked crosses, and eerie nighttime details. Start with navy, charcoal, or deep purple polish to create a dark background, then add raised gray headstones and small white ghost figures. Silver stars or muted green accents can suggest a mysterious atmosphere without making the design too busy. Spread the scenery across a few nails rather than squeezing every detail onto one finger. Longer nail shapes are particularly useful when you want to include several small elements in the same scene.
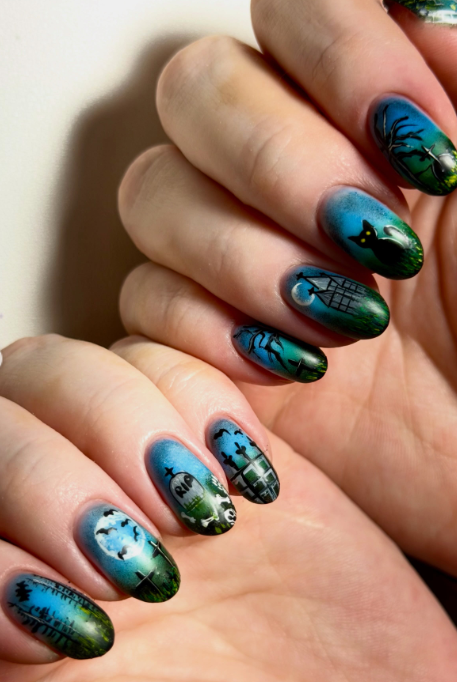
Credit by: nailxkc
11. 3D Spider Charms
Raised spider charms give Halloween nails a creepy-crawly finish with plenty of texture. Choose glossy black spiders for a classic spooky look or silver versions for a more decorative style. Nude, smoky purple, and pale gray bases help the charms remain visible against the background. Position a spider near the side of the nail or close to the tip to create a crawling effect. Secure each charm with suitable nail adhesive or professional gel application, and avoid oversized decorations that might catch on clothing or hair.
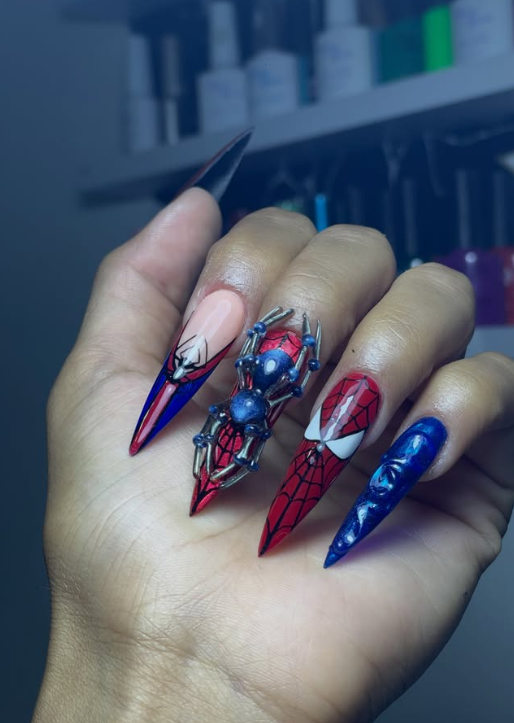
Credit by: derleinn
12. Ghostly French Tips
Ghostly French tips combine a neat manicure with a playful seasonal detail. Replace traditional curved white tips with tiny ghost shapes, adding small black eyes and mouths for a recognizable Halloween finish. Sheer pink or milky nude polish keeps the base looking clean and fresh, while subtle raised edges provide extra dimension. Short square nails suit a minimal version, and almond shapes create a softer appearance. Add a little silver shimmer to one finger if you want more sparkle without distracting from the ghost-inspired tips.
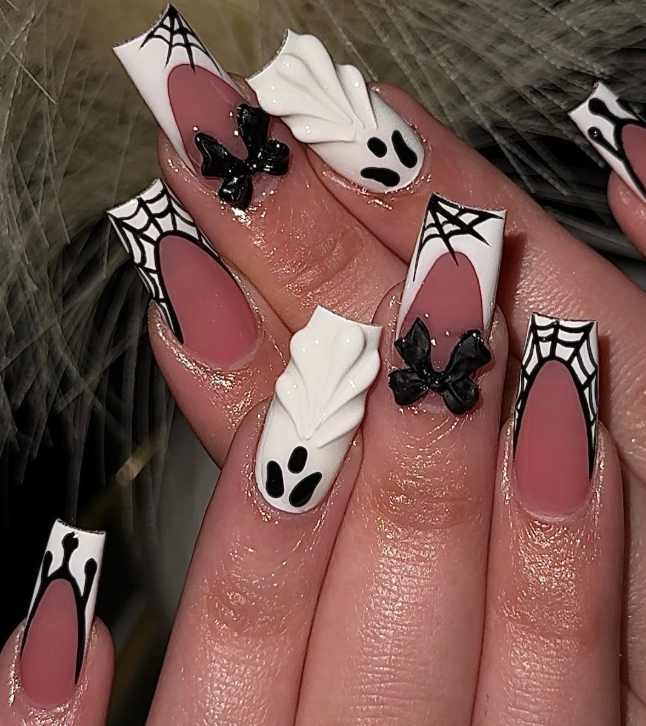
Credit by: tippdby.kay
13. Orange Pumpkin Sculptures
Bright orange pumpkin sculptures make a manicure feel festive and colorful. Rounded gel shapes, curved grooves, and tiny green stems help create a fuller pumpkin appearance with noticeable depth. A clear or pale beige base keeps the overall design light, while brown and dark green accents add a richer autumn feel. Mixing different pumpkin sizes creates variety across the fingers and prevents the set from looking repetitive. Finish with a compatible top coat where appropriate, taking care not to flatten the raised details that give the pumpkins their sculpted look.
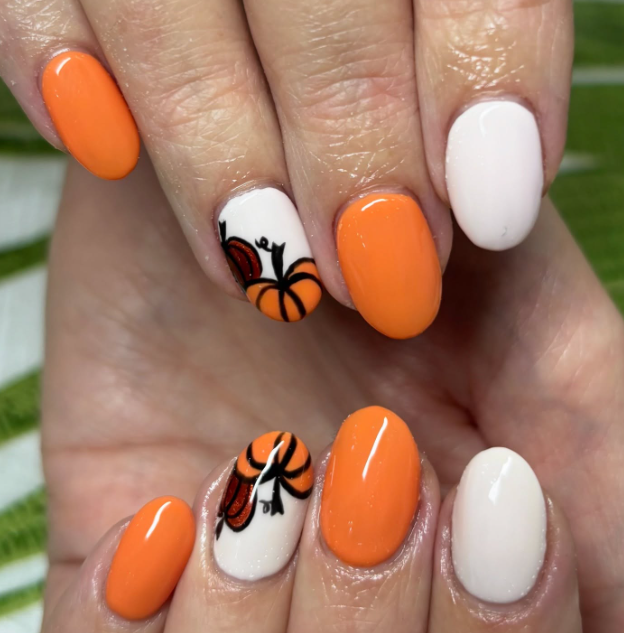
Credit by: nails_and_beauty_by_daisy
14. 3D Candy Corn Nails
Candy corn decorations bring a sweet and cheerful twist to Halloween manicures. Shape small pieces with three recognizable color sections: yellow at the base, orange in the middle, and white at the tip. A creamy or transparent polish underneath allows the colorful decorations to stand out without overwhelming the design. Tiny stars or small dots can fill empty spaces between the raised pieces. Pair candy corn accents with orange, pale yellow, or soft white polish on the other fingers for a coordinated manicure inspired by classic Halloween treats.
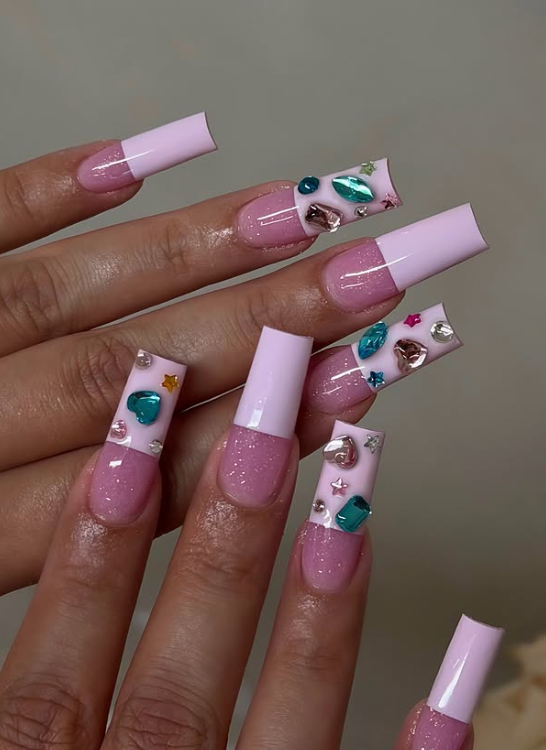
Credit by:_nailedbyalo
15. Black Widow Webs
Black widow-inspired webs create a darker, more dramatic alternative to traditional spiderweb designs. Raised black lines look striking against deep red, charcoal, or glossy black polish, especially when a small contrasting spider adds another layer of detail. Keep the web pattern delicate and evenly spaced so its shape remains easy to recognize. A single detailed web nail paired with burgundy or black solid-color nails can create an elegant gothic finish. For added contrast, incorporate a tiny red accent without covering the entire design in extra decoration.
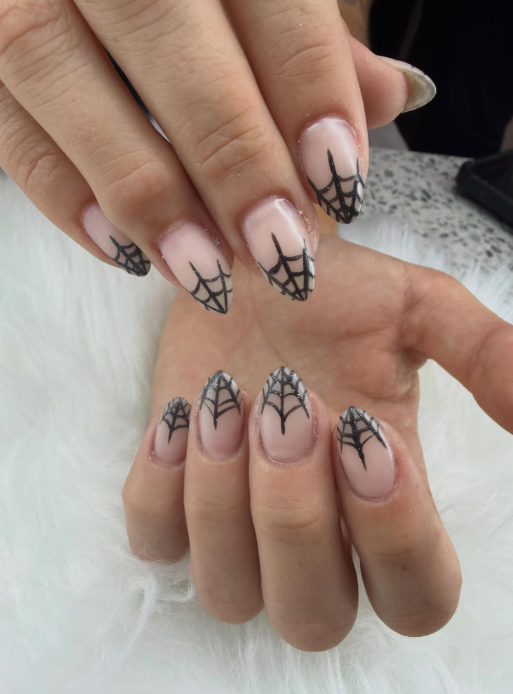
Credit by: jjpolishstudio
16. Gothic Cross Embellishments
Gothic cross charms suit alternative fashion and dramatic Halloween manicures. Raised crosses in black, antique silver, or muted gold create an eye-catching contrast against burgundy, charcoal, and sheer nude polish. Small metallic studs or narrow decorative borders can add texture while keeping the central symbol easy to see. For a softer approach, choose a slim silver cross on a neutral base. Pair the embellishments with dark French tips or subtle chrome details to create a coordinated look that feels moody, elegant, and suitable for evening events.
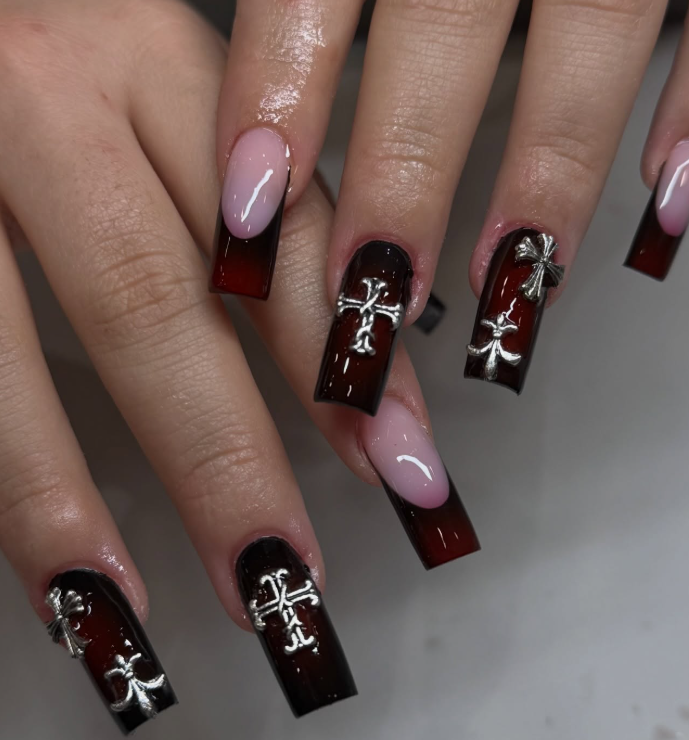
Credit by: blessed_nailsspa
17. 3D Witchy Cauldron
A tiny witch’s cauldron turns your manicure into a miniature Halloween scene. Sculpt a rounded black pot with a raised rim, then add bright green, purple, or orange gel to represent bubbling magical liquid. Small bubbles and wisps of colored smoke can make the design feel more imaginative. Midnight blue and deep purple polish create a mysterious background, while nude shades give the artwork a lighter appearance. Reserve the cauldron for one statement nail and use simple stars or solid seasonal colors on the remaining fingers.
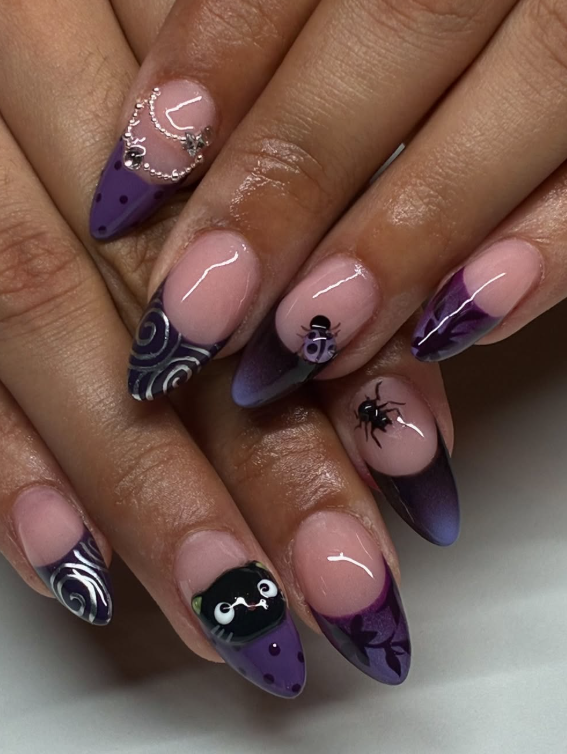
Credit by: nailedbyvalz
18. Haunted Doll Details
Haunted doll nails offer an eerie, vintage-inspired style with delicate decorative elements. Soft ivory, dusty pink, and muted red create a porcelain-like color palette, while raised bows, tiny buttons, and miniature ribbons add dimension. Small crack patterns or a carefully painted doll face can make the design feel mysterious without turning every nail into a horror scene. Combine glossy surfaces with one matte accent for added contrast. Keeping the artwork focused on a few nails allows each detail to remain visible and prevents the overall manicure from looking crowded.
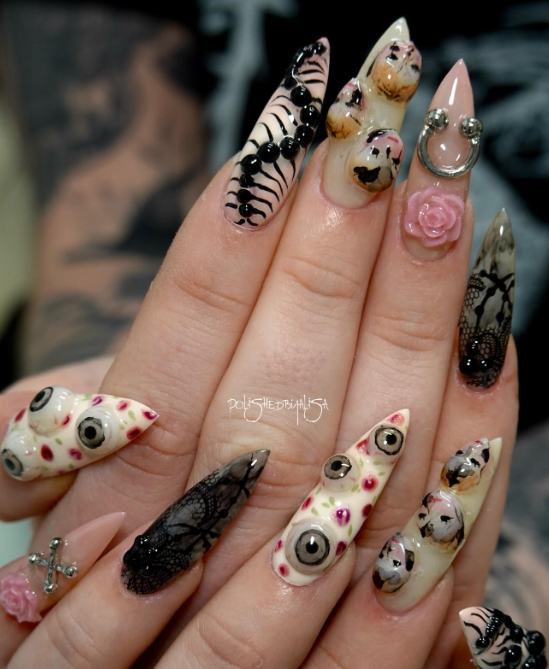
Credit by: polishedbyalisa
19. Spooky 3D Flowers
Sculpted flowers can create a gothic Halloween look when you choose darker colors instead of traditional spring shades. Deep burgundy, plum, black, and charcoal petals bring a moody atmosphere to raised floral designs. Tiny silver or gold centers add contrast, while a nude or dark base helps the petals stand out. For a stronger Halloween theme, include a small spiderweb or crystal accent on a separate nail. Limit the larger flowers to one or two fingers so their layered petals remain easy to appreciate.
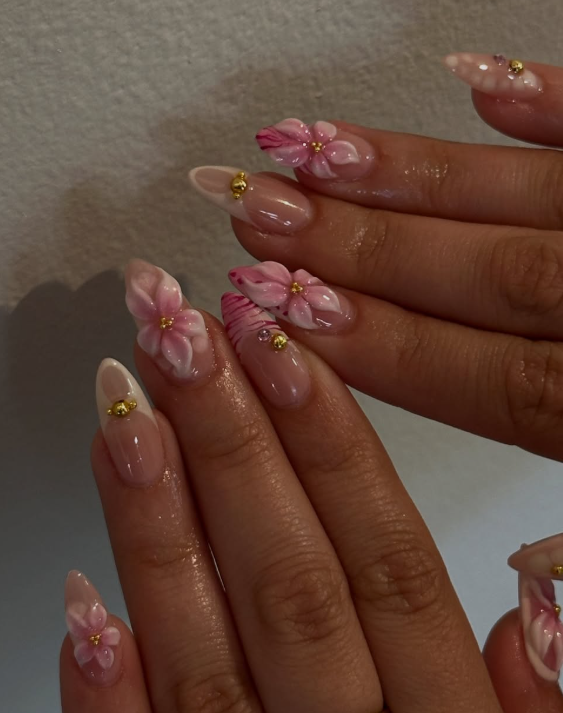
Credit by: kimchisnails
20. Metallic Skull Embellishments
Metallic skull decorations combine spooky imagery with a sleek, reflective finish. Silver chrome, antique gold, and gunmetal shades look striking against matte black, deep burgundy, or milky nude polish. Compact skull charms create a more refined appearance, while one larger sculpted skull can become the focal point of a statement nail. Simple surrounding colors allow the metallic surfaces to catch the light without competing with other details. Pairing chrome skulls with understated nails creates a dramatic manicure that feels polished rather than excessively busy.
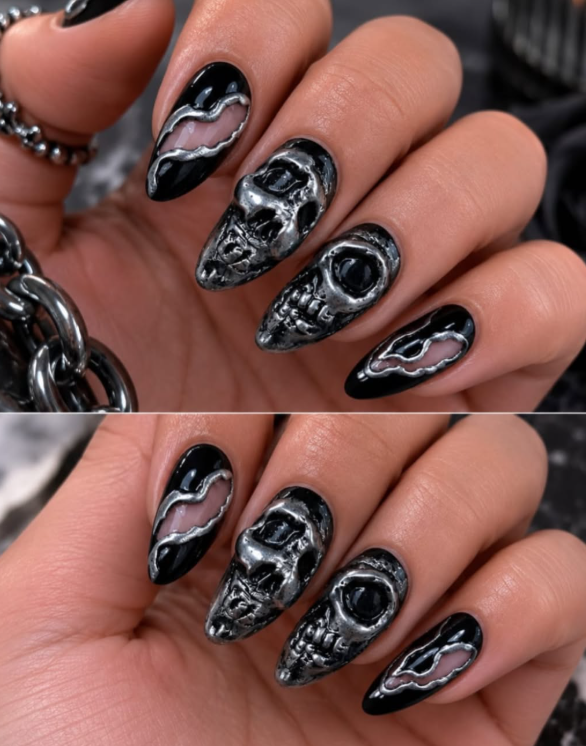
Credit by: nazinailartist_shiraz
21. 3D Vampire Fangs
Raised vampire fangs give Halloween nails a sharp and playful horror-inspired detail. Shape two small ivory fangs against black, cherry-red, or deep burgundy polish to create the look of a tiny vampire smile. A sheer nude base offers a softer option for anyone who prefers less dramatic nail art. Small red accents can reinforce the theme, while silver details add a slightly gothic finish. Keep the sculpted teeth compact and smooth, especially near the nail tips, so they remain comfortable during everyday activities.
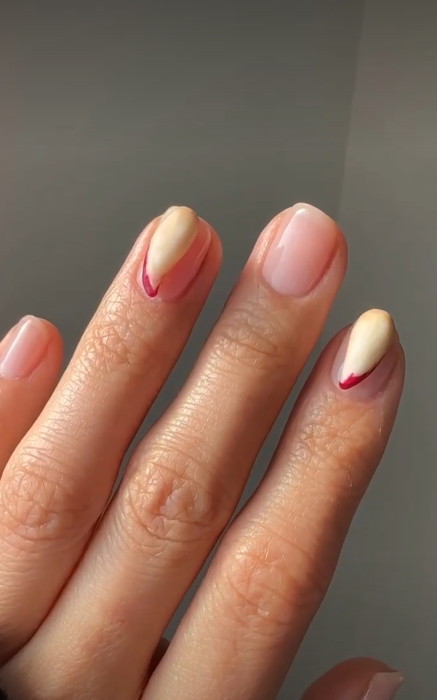
Credit by: betina_goldstein
22. Creepy Crawling Spiders
Tiny crawling spiders make a manicure feel lively and slightly unsettling. Create small raised bodies with black gel, then add thin legs that extend naturally across the nail surface. Pale gray, milky white, and nude polish provide enough contrast to reveal the smaller details. Vary the spiders’ positions to suggest movement instead of placing identical figures on every finger. A few fine web lines can connect the theme, while a matte background makes glossy spider bodies stand out. Choose manageable shapes that do not interfere with daily tasks.
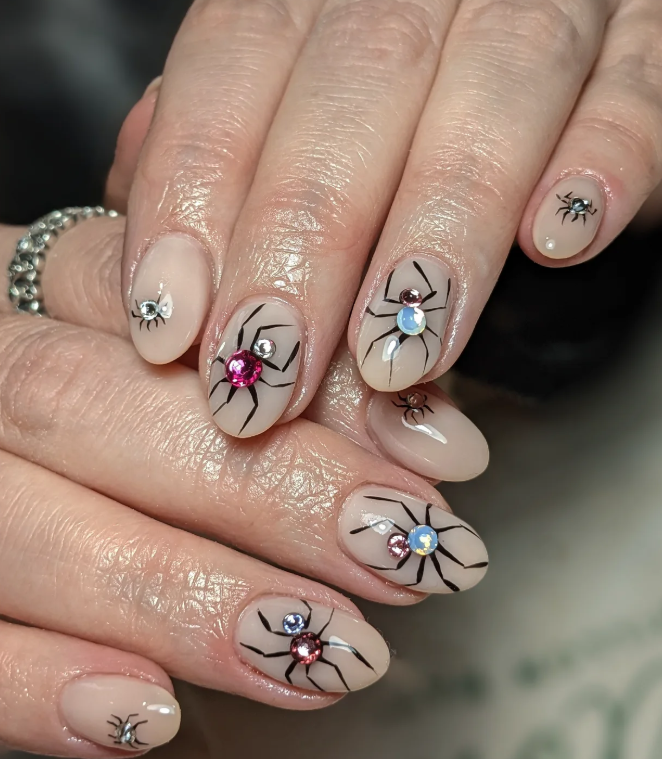
Credit by: sauce.nailco
23. 3D Coffin Nail Art
Miniature coffin decorations bring a classic gothic touch to Halloween manicures. Sculpt small coffin shapes using black, charcoal, deep purple, or metallic silver gel, then add tiny crosses or decorative borders for extra character. Pale gray and nude bases help the raised pieces remain visible, while dark polish creates a more dramatic finish. Longer nails offer additional room for detailed designs, but small coffin accents can also work on shorter lengths. Pair the decorations with solid black or subtle shimmer to maintain a coordinated look.
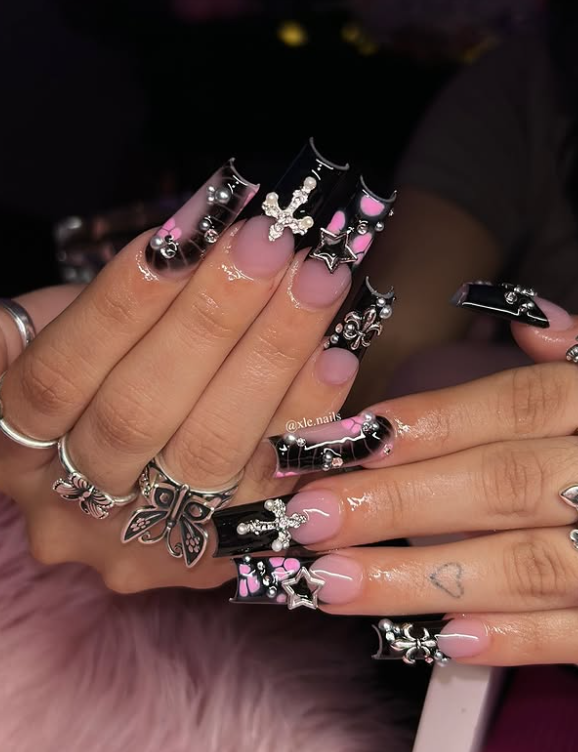
Credit by: xle.nails
24. Haunted House Accents
Haunted house decorations turn your manicure into a collection of tiny spooky landscapes. Raised rooftops, crooked chimneys, miniature doors, and small windows create the outline of a mysterious house. Navy, charcoal, and smoky purple polish establish a nighttime background, while tiny yellow windows suggest a faint glow. Adding a small moon or a few silver stars can complete the scene. Keep the detailed houses on one or two nails so the artwork remains clear, then use simple dark polish on the remaining fingers for balance.
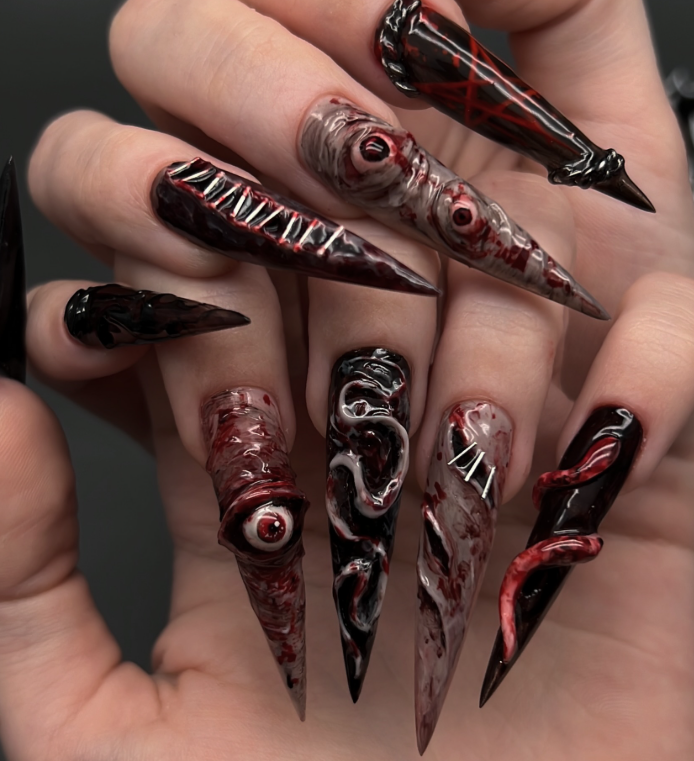
Credit by: akinotsume
25. Crystal Ghost Embellishments
Crystal ghosts combine playful Halloween characters with a delicate, sparkling finish. Create small ghost shapes from milky white or translucent gel, then add tiny facial details and a few clear crystals around the design. Sheer pink, pearl, and nude bases provide a soft background that allows the raised decorations to catch the light. Silver accents can enhance the icy effect, while pale lavender adds a subtle hint of color. Keep crystal placements small and secure so the manicure feels elegant without becoming uncomfortable or overly heavy.
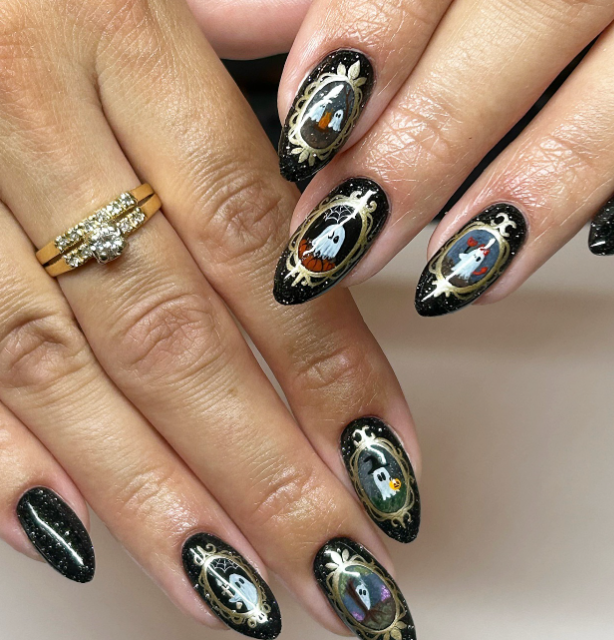
Credit by: naildesignbykayla
Conclusion
Choosing your favorite Halloween manicure is easier when you consider your personal style, nail length, and daily routine. 3D spooky nail designs can bring playful ghosts and creepy creatures to life, while sculpted Halloween manicures offer room for pumpkins, vampire fangs, gothic symbols, and miniature haunted scenes. For a more glamorous finish, crystals and metallic decorations add dimension without requiring every nail to feature an elaborate design.
Before your salon appointment, save a few reference pictures and discuss the size, placement, and security of raised decorations with your nail technician. Remember that larger charms and thick sculpted pieces may feel less practical for everyday activities. With thoughtful placement and colors you love, dimensional Halloween nail art can give your seasonal look a creative finish that feels personal, stylish, and ready for spooky-season celebrations.
